


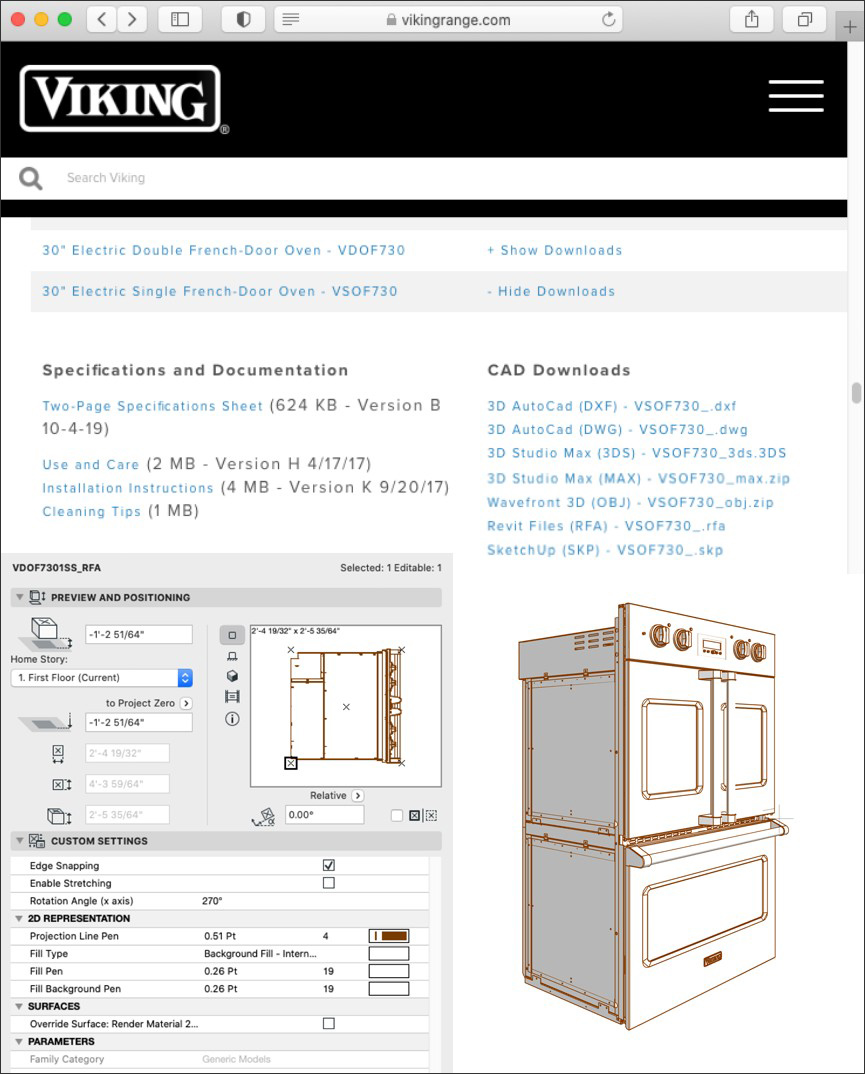
Ever had issues with an object file downloaded from a manufacturer, consultant, or online library? You’re not alone! Objects on the web are a valuable resource for Archicad users but can often have issues with file size, polygon count, layer management, missing materials and other problems that need to be resolved when imported to a project.
In this article, we will review how the new release of ModelPort helps manage a problematic model downloaded from the Viking Range website. These steps will show you how to achieve the following results:
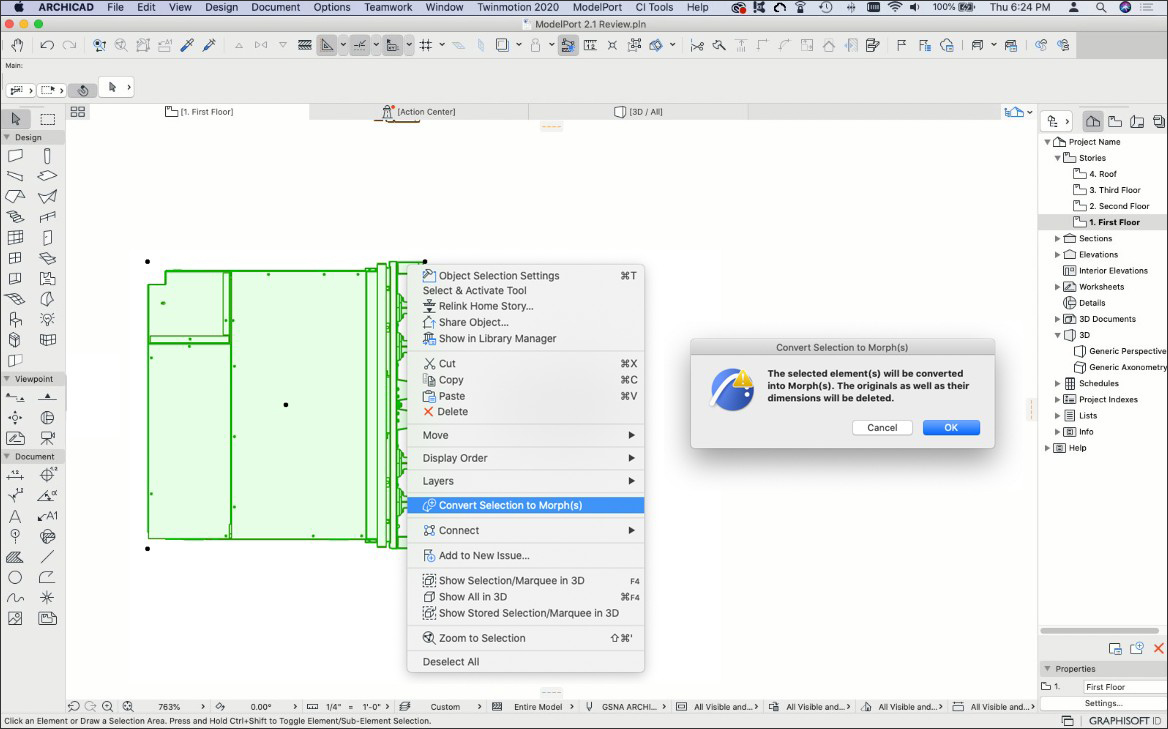
Manufacturer objects often have more detail than what’s required for a project model. In the case of this Viking appliance, the back half of the oven is hidden when placed in a cabinet yet contains a lot of detail not required for a BIM model. To simplify the oven, we will first convert the model into a Morph. To do this select the object, right-click, and choose Convert Selection to Morph.
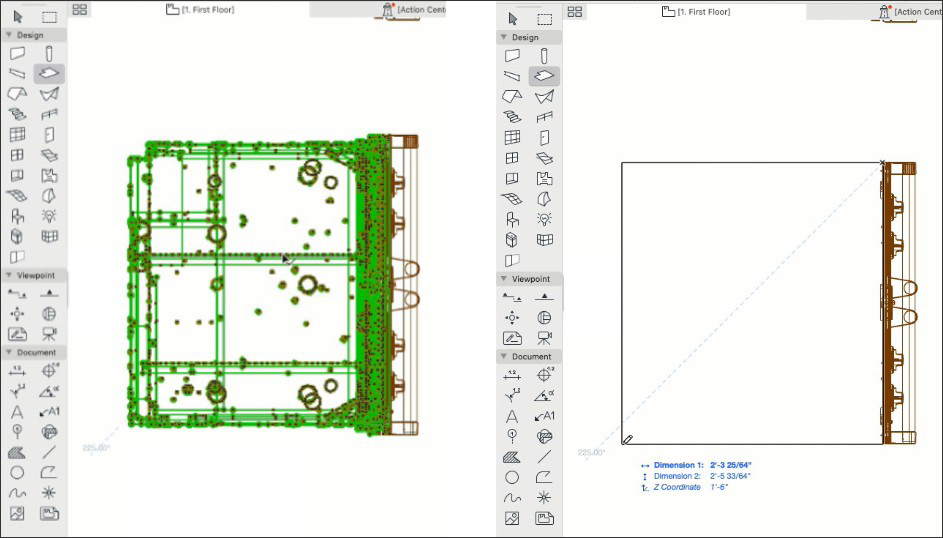
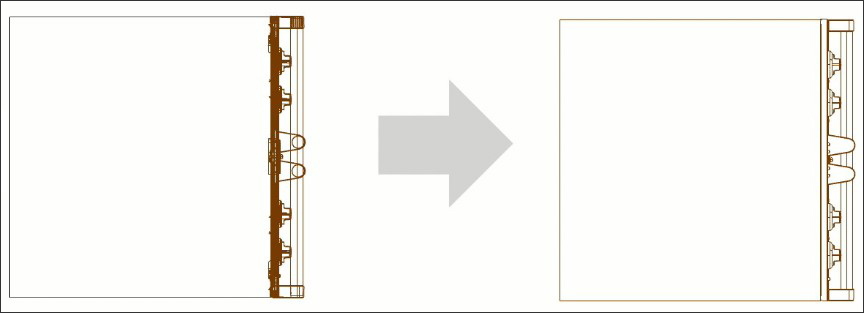
Next, we’ll select the back of the oven, delete the detailed Morph elements that would be hidden, and draw a Slab to represent the back part of the oven.
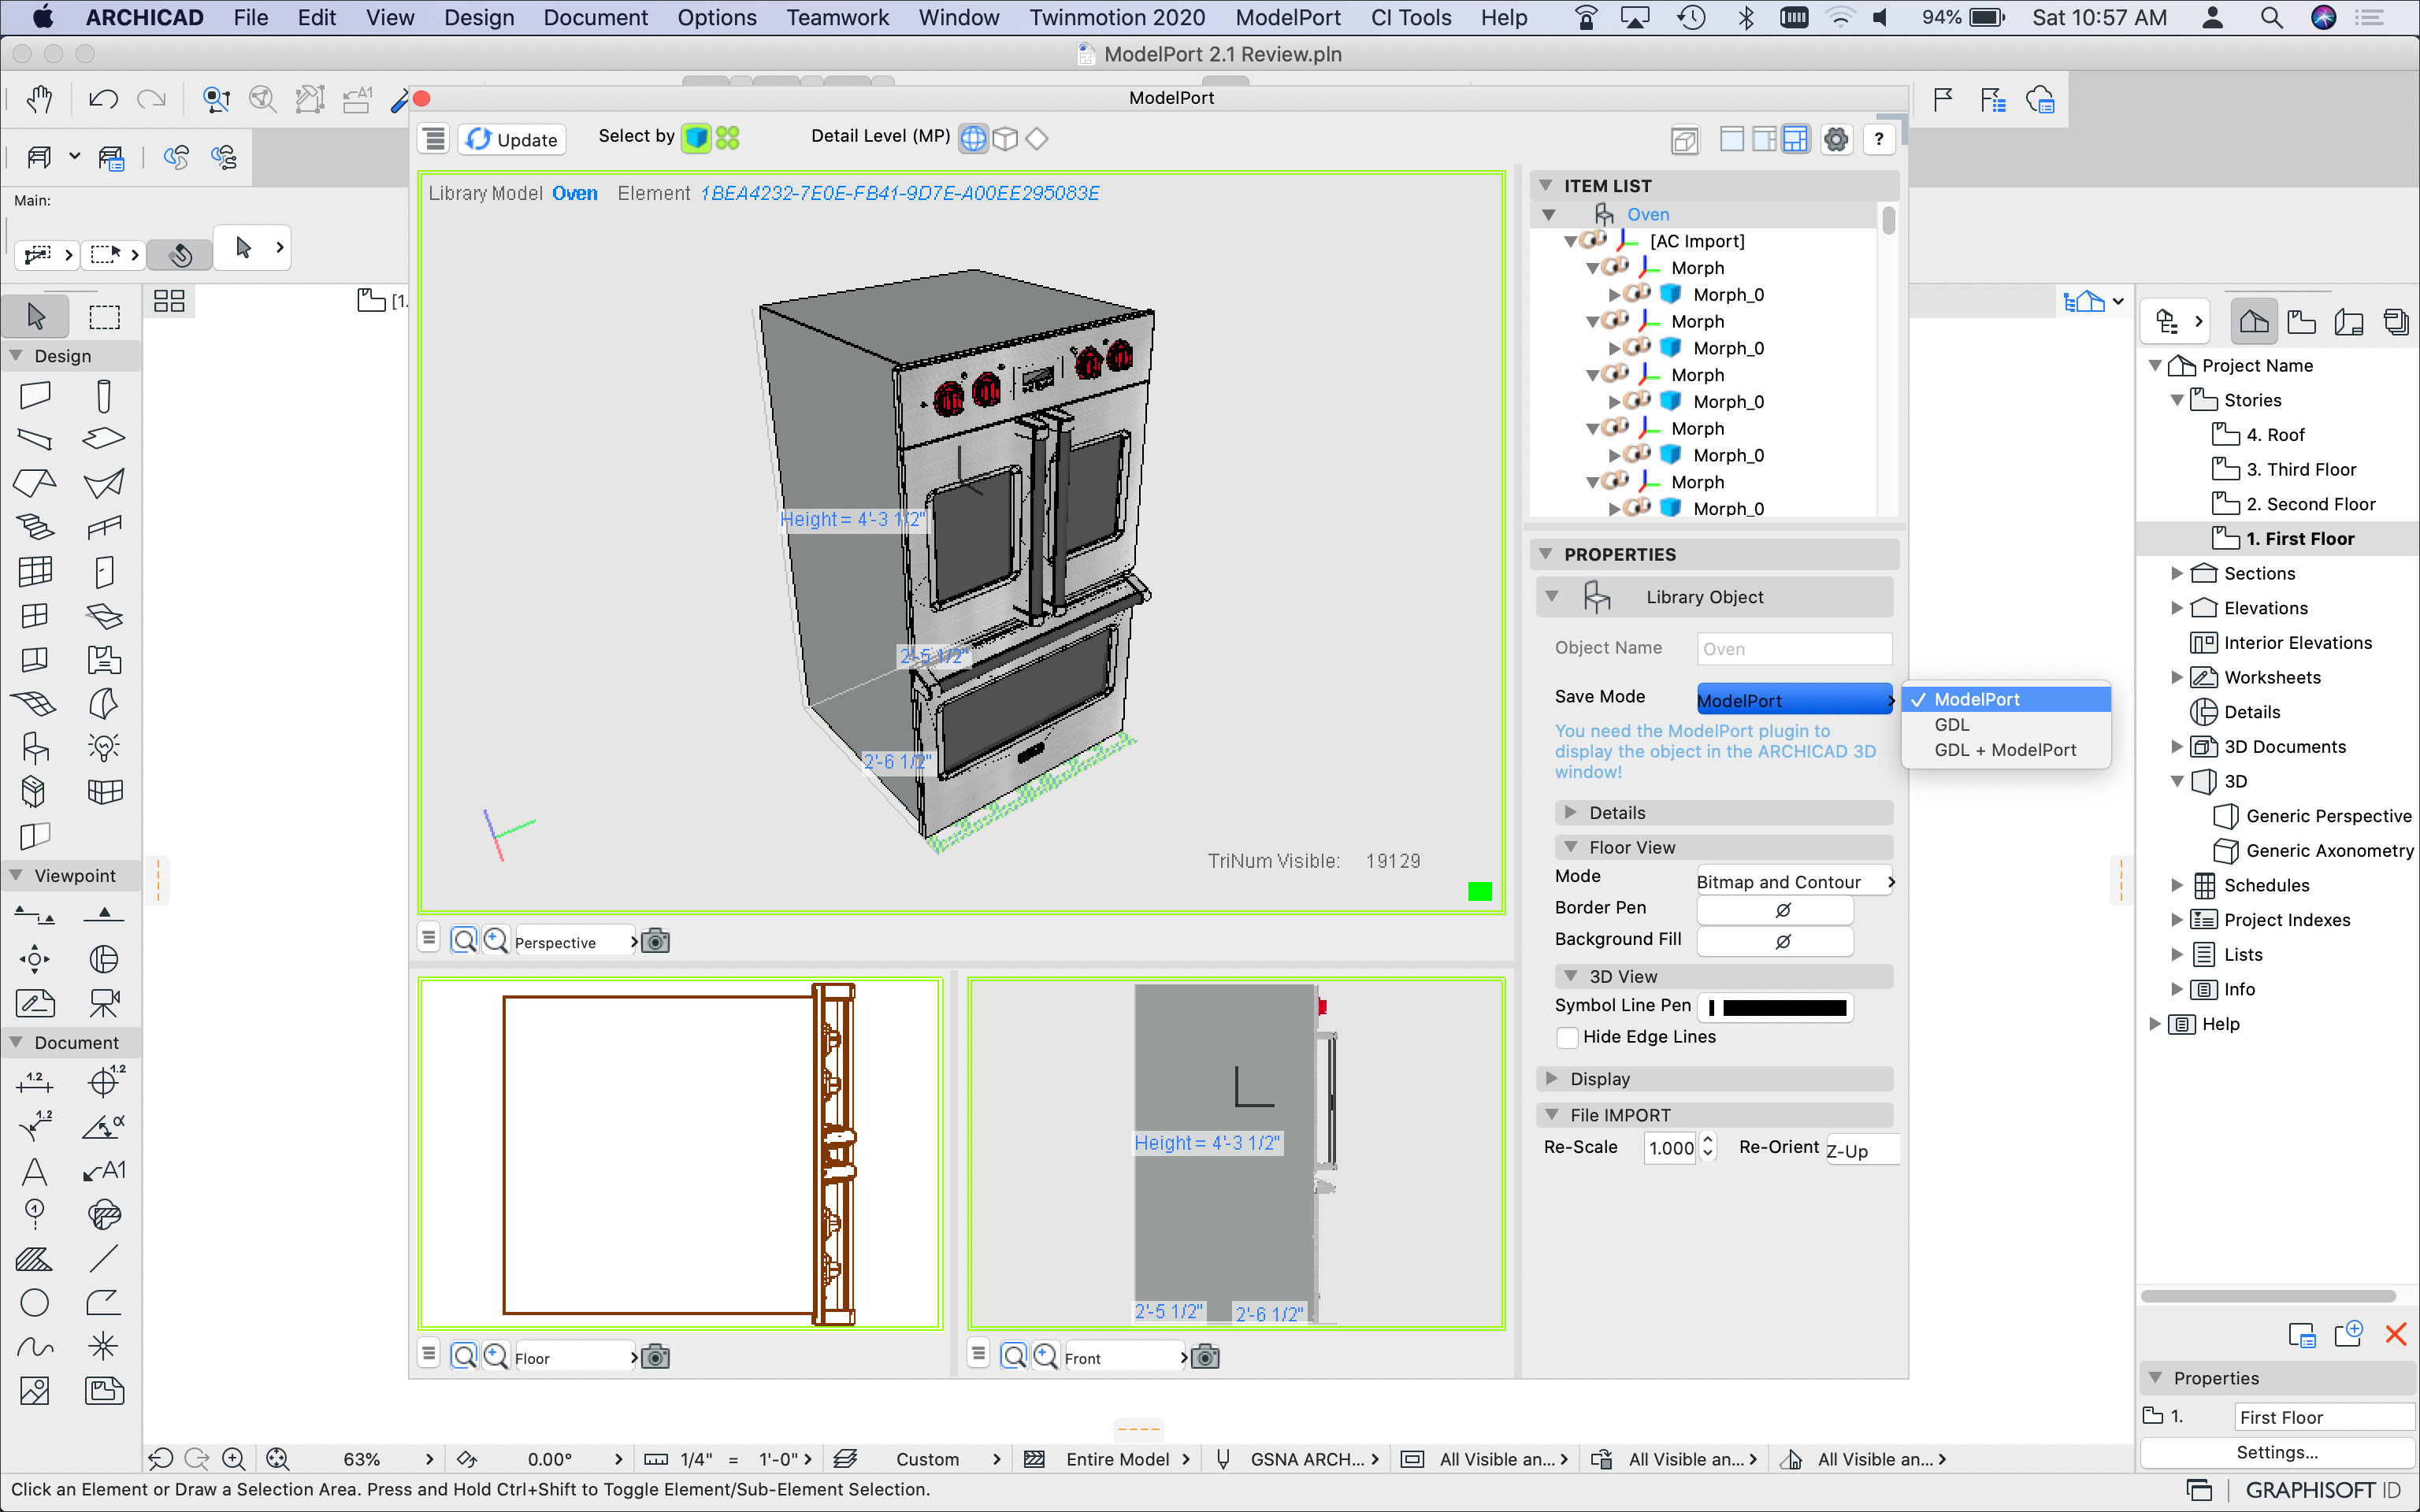
Finally, select the oven elements and choose ModelPort’s new feature that allows you to “Import from Archicad”.
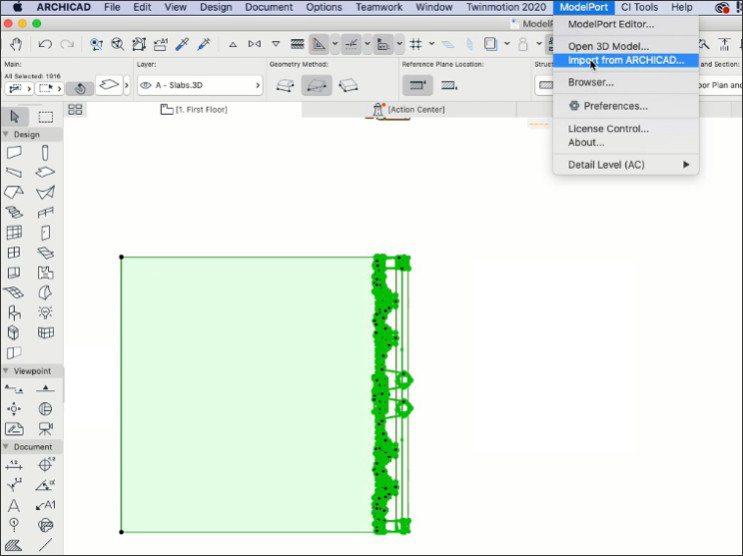
ModelPort will open and display the simplified Viking oven.
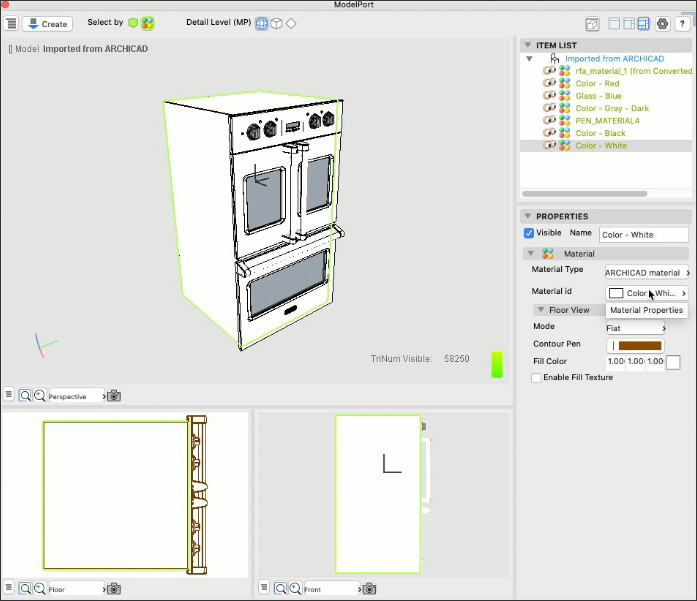
Also note that ModelPort automatically cleans up the 2D plan graphics for the oven knobs and front panel details.
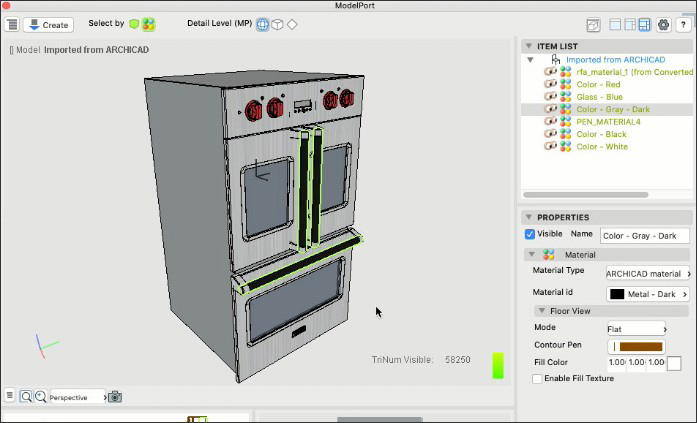
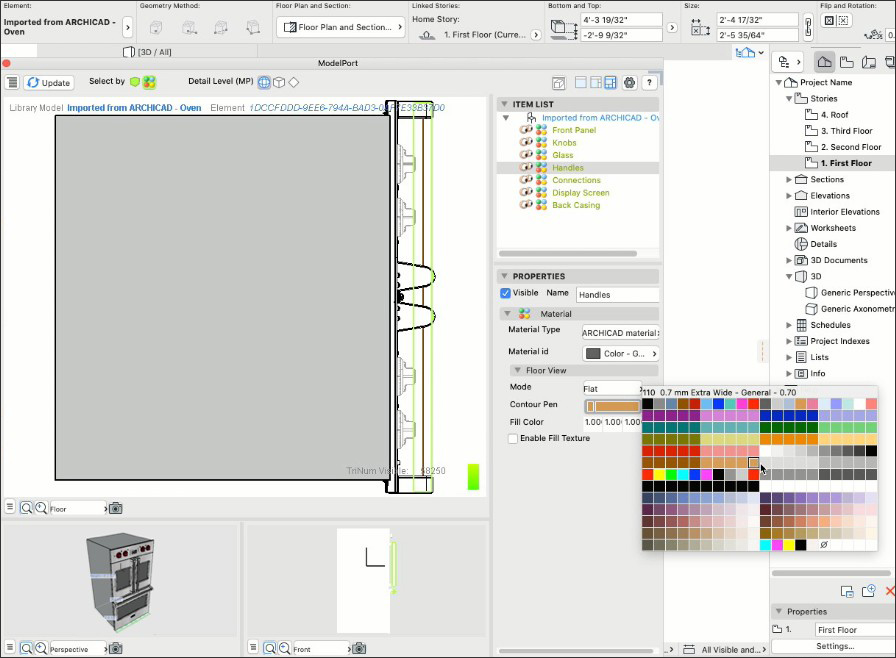
With ModelPort, you can interactively edit material colors and textures for imported objects. As an example, the Viking oven has no color or materials when imported to Archicad. With ModelPort, we can use the Properties panel to change the knobs to red and the handles to black, as well as change the back oven metal material and glass color.
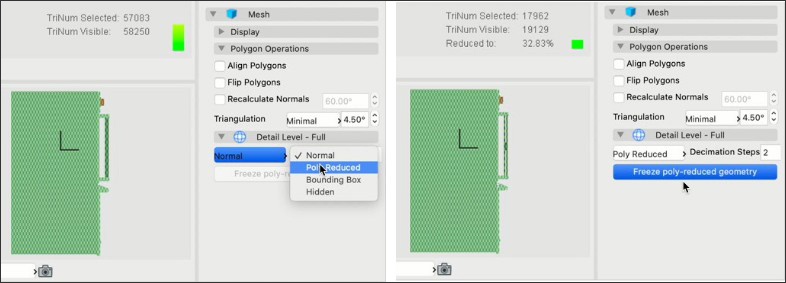
The Viking Oven is a very large object that contains 177,110 polygons, which can impact the performance of a project. In Step 1 we deleted the back of the oven which simplified the model and reduced the polygon geometry. In this step, we will reduce the polygon count further using the Poly-Reduced feature. With these two steps, we will achieve an 89% reduction in the polygon count.
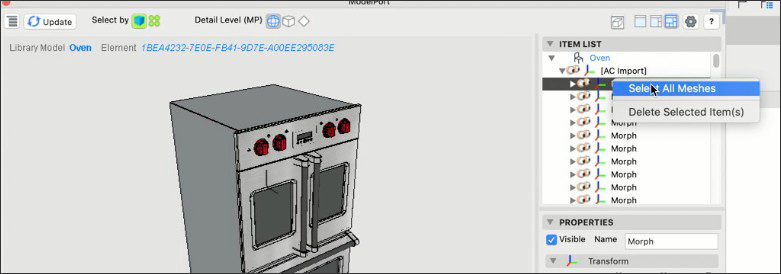
Let’s start by using ModelPort’s new “Select All Meshes” feature to choose specific meshes within the model to apply the poly-reduction. To do this, right-click in the Items List and choose the pop-up menu, “Select All Meshes”. To deselect meshes that will not be included in the polygon reduction, hold down the Shift Key and deselect meshes in the list.
Next, choose the Poly Reduced option in the Detail Level - Full panel and enter the Decimation Steps number. Note that as you increase the number of Decimation Steps, it will result in less polygons but it will also change the model quality (i.e., 1 results in more polygons which is higher quality, while 3 will decrease the polygons but also reduce the quality). When finished click the Freeze Poly-Reduced Geometry button.
Reducing the file size is easy. In the Properties panel, choose the ModelPort file format option in the Save Mode and click the Update button. Using the ModelPort format will reduce objects up to 80% of their original file size.
The final step is to customize the graphics for line weights and fill colors. To do this, select the lines or fills to edit in the preview window. Once selected, customize the color for the Contour Pen and Fill Color in the Floor View panel.
With this five-step process, ModelPort reduced the file size of the Viking Oven by 94% and achieved an 89% reduction in polygons while maintaining a high level of quality. It also allowed us to clean up the plan symbol, edit elements, customize line and fill graphics, and edit materials.

To learn more about importing, editing, and managing objects with ModelPort, visit https://archvista.com/modelport/. To download the fully functioning free demo version, go to: https://archvista.com/modelport-trial-download.
 Thomas M. Simmons is the President of ARCHVISTA Consulting, a business focused on BIM and design immersion technologies with clients throughout Northern California and the Pacific Northwest. His company has over 20 years of experience implementing BIM in architecture, interior design and construction companies ranging from small firms to multi-national corporations. While his current focus at ARCHVISTA is on technology, he began his career in architecture at EHDD where he was the Director of Design Technologies. Tom has been on the board of AIA East Bay and served on the AIACC IPD Task Force. He regularly speaks and shares insights at user events, national and regional conferences, professional organizations, and architecture firms.
AECbytes content should not be reproduced on any other website, blog, print publication, or newsletter without permission.