


Almost anyone can start using Enscape to create high-fidelity real-time renderings in a snap. But that's just the beginning of what's possible. With a little bit of know-how, you can push things further to make your renderings the next best thing to reality.
These five pro-tips will leave your clients wondering if you traveled to the future to take photos of the finished project.
PBR materials are based on real-world products and are thus very authentic looking. You can search for them online, but there are plenty of ready-to-use resources in the Enscape Material Library available with Enscape 3.1 and up. These materials are game-changing tools. But having the right tools is just part of the equation. You also need to know how to use them.
If you’re using materials from an external source, such as ambientCG, once you've selected your materials, download the available maps — we typically use the roughness, displacement, and bump maps, among a few others.
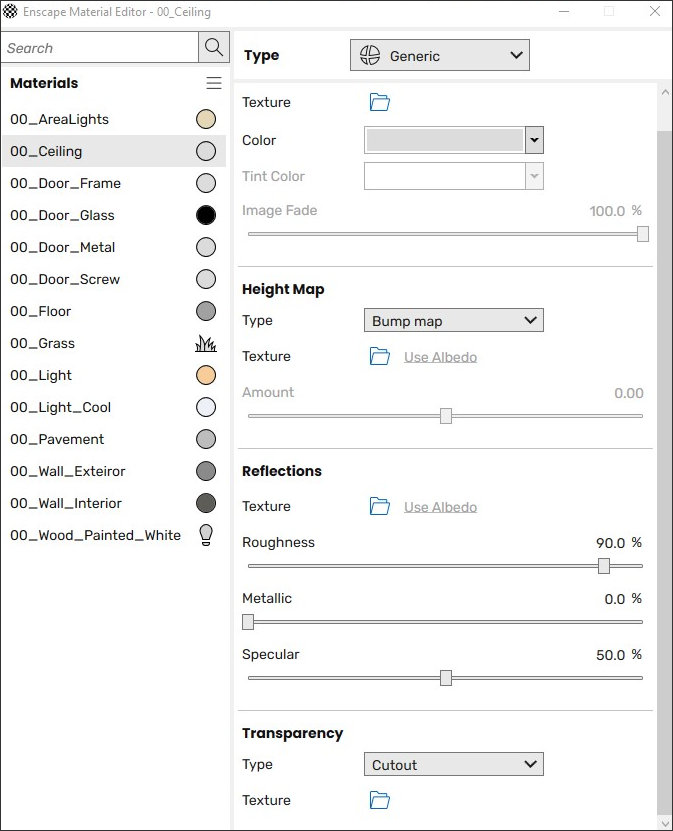
Apply them to your Enscape render by creating a new material in your native modeling software and uploading the maps one by one. Then go to the Enscape Material Editor tab and import each map into its section. This will not only make your model look more natural; it will save you a lot of time compared to configuring the material parameters manually. Check out this video tutorial for step-by-step instructions:
Enscape offers incredible default lighting — but as with the materials, a few tweaks will give it a boost toward realism.
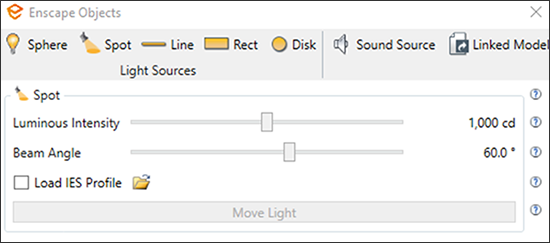
IES lighting profiles let you modify your light sources to resemble real-world lighting effects more closely. Readily available on manufacturers' websites and sites like ies library, these IES files are based on the unique lighting profile of specific products.
You can easily apply them in Enscape using the "load IES profile" section in the Objects tab. Once it's loaded, you'll see that Enscape’s default lighting profile is replaced with your new, more realistic, IES profile.
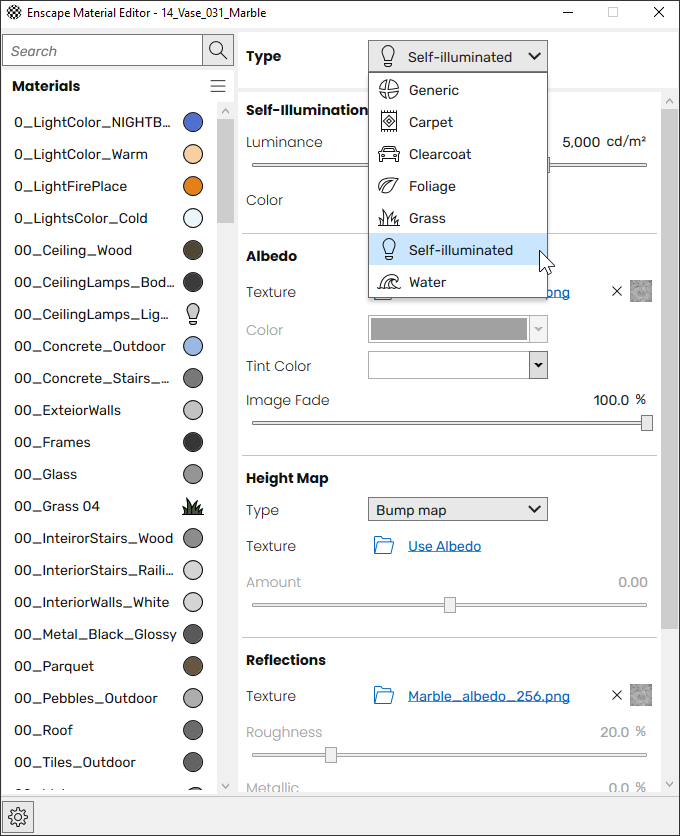
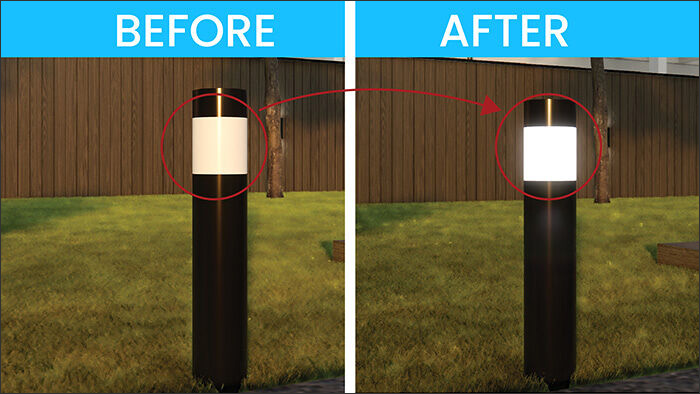
Don't forget to turn the lights on. To ensure your artificial light sources are providing realistic illumination, select the material-in-question with the eyedropper tool and change it to "self-illuminated" in the Enscape Material Editor. It will now look like the light is coming from inside the object. You can tweak the lighting sliders to capture the optimal ambiance for your scene.
High Dynamic Range Images (HDRI) are panoramic photos captured from a single fixed point. They help add horizons to renders and provide a realistic light source. Don't overlook these! They're more than just backgrounds and can be found on sites such as Poly Haven and Poliigon.
Enscape has HDRIs built-in (referred to as Skybox as a background), but you can also apply a custom image or one you found online. Just go to Enscape Visual Settings, click on the "Sky" tab, change the option to "Skybox" and upload it.
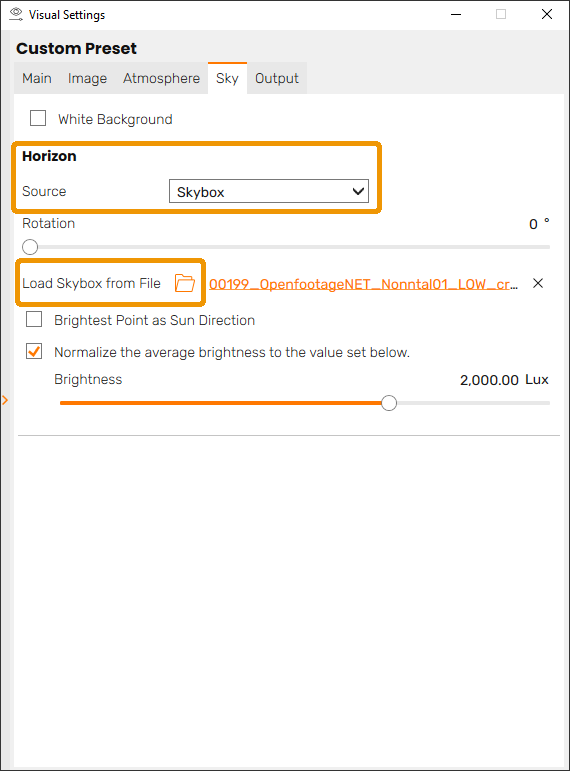
Test out a few to find one that's most appropriate for your project. Since the surface of your model will reflect the properties of the HDRI, whatever you choose will have a profound impact on the look, feel, and mood of your final visualization.
No corner is ever precisely 90 degrees. No window ledge without dust. No floor without a scuff.
To imbue your 3D visualization with imperfection, you first need to find a source of imperfection maps. You can find plenty of imperfection maps online, such as on Texture Box. Dust, scratches, and fingerprints are particularly effective, but whatever you choose, there are two main ways to incorporate them into your render.
The quickest way is to apply the surface imperfection to a material using the Material Editor. You can add the map in the "roughness" section.
But to apply the imperfection to a specific area, you'll need to take a few more steps. First, use the "freehand line" tool to create a new surface within the existing one that you want to rough up. Using the freehand tool will make sure it's appropriately irregular. In the newly created surface, apply a copy of the existing material, then apply the imperfection map in the "roughness" section. Adjust the sliders as needed to make it look more natural.
So, there you have it. Five tips for bringing your rendering even closer to reality. It takes a little bit of work, but for the right project and the right client, it can make a real world of difference.
Check out the following video to see these ideas in action!
 Melos is an architecture student, 3D visualizer, and the creator of the Youtube channel “Scale.” Being surrounded by the world of architecture his whole life, Melos's passion led him to pursue content creation as a way to give back to the community.
AECbytes content should not be reproduced on any other website, blog, print publication, or newsletter without permission.