


Enscape is a real-time rendering application that connects directly to five different design applications popularly used in AEC: Revit, Archicad, SketchUp, Rhino, and Vectorworks. With it, designers can see the impact of design changes in real time, which is not just useful to them for their design work, but also for sharing their designs with their clients and getting immediate feedback. The quality of the renderings is so good that most of the time, a separate rendering application would not even be needed, unless a highly sophisticated animation with moving objects is required (of the kind that can be created, in say, Twinmotion or Lumion).
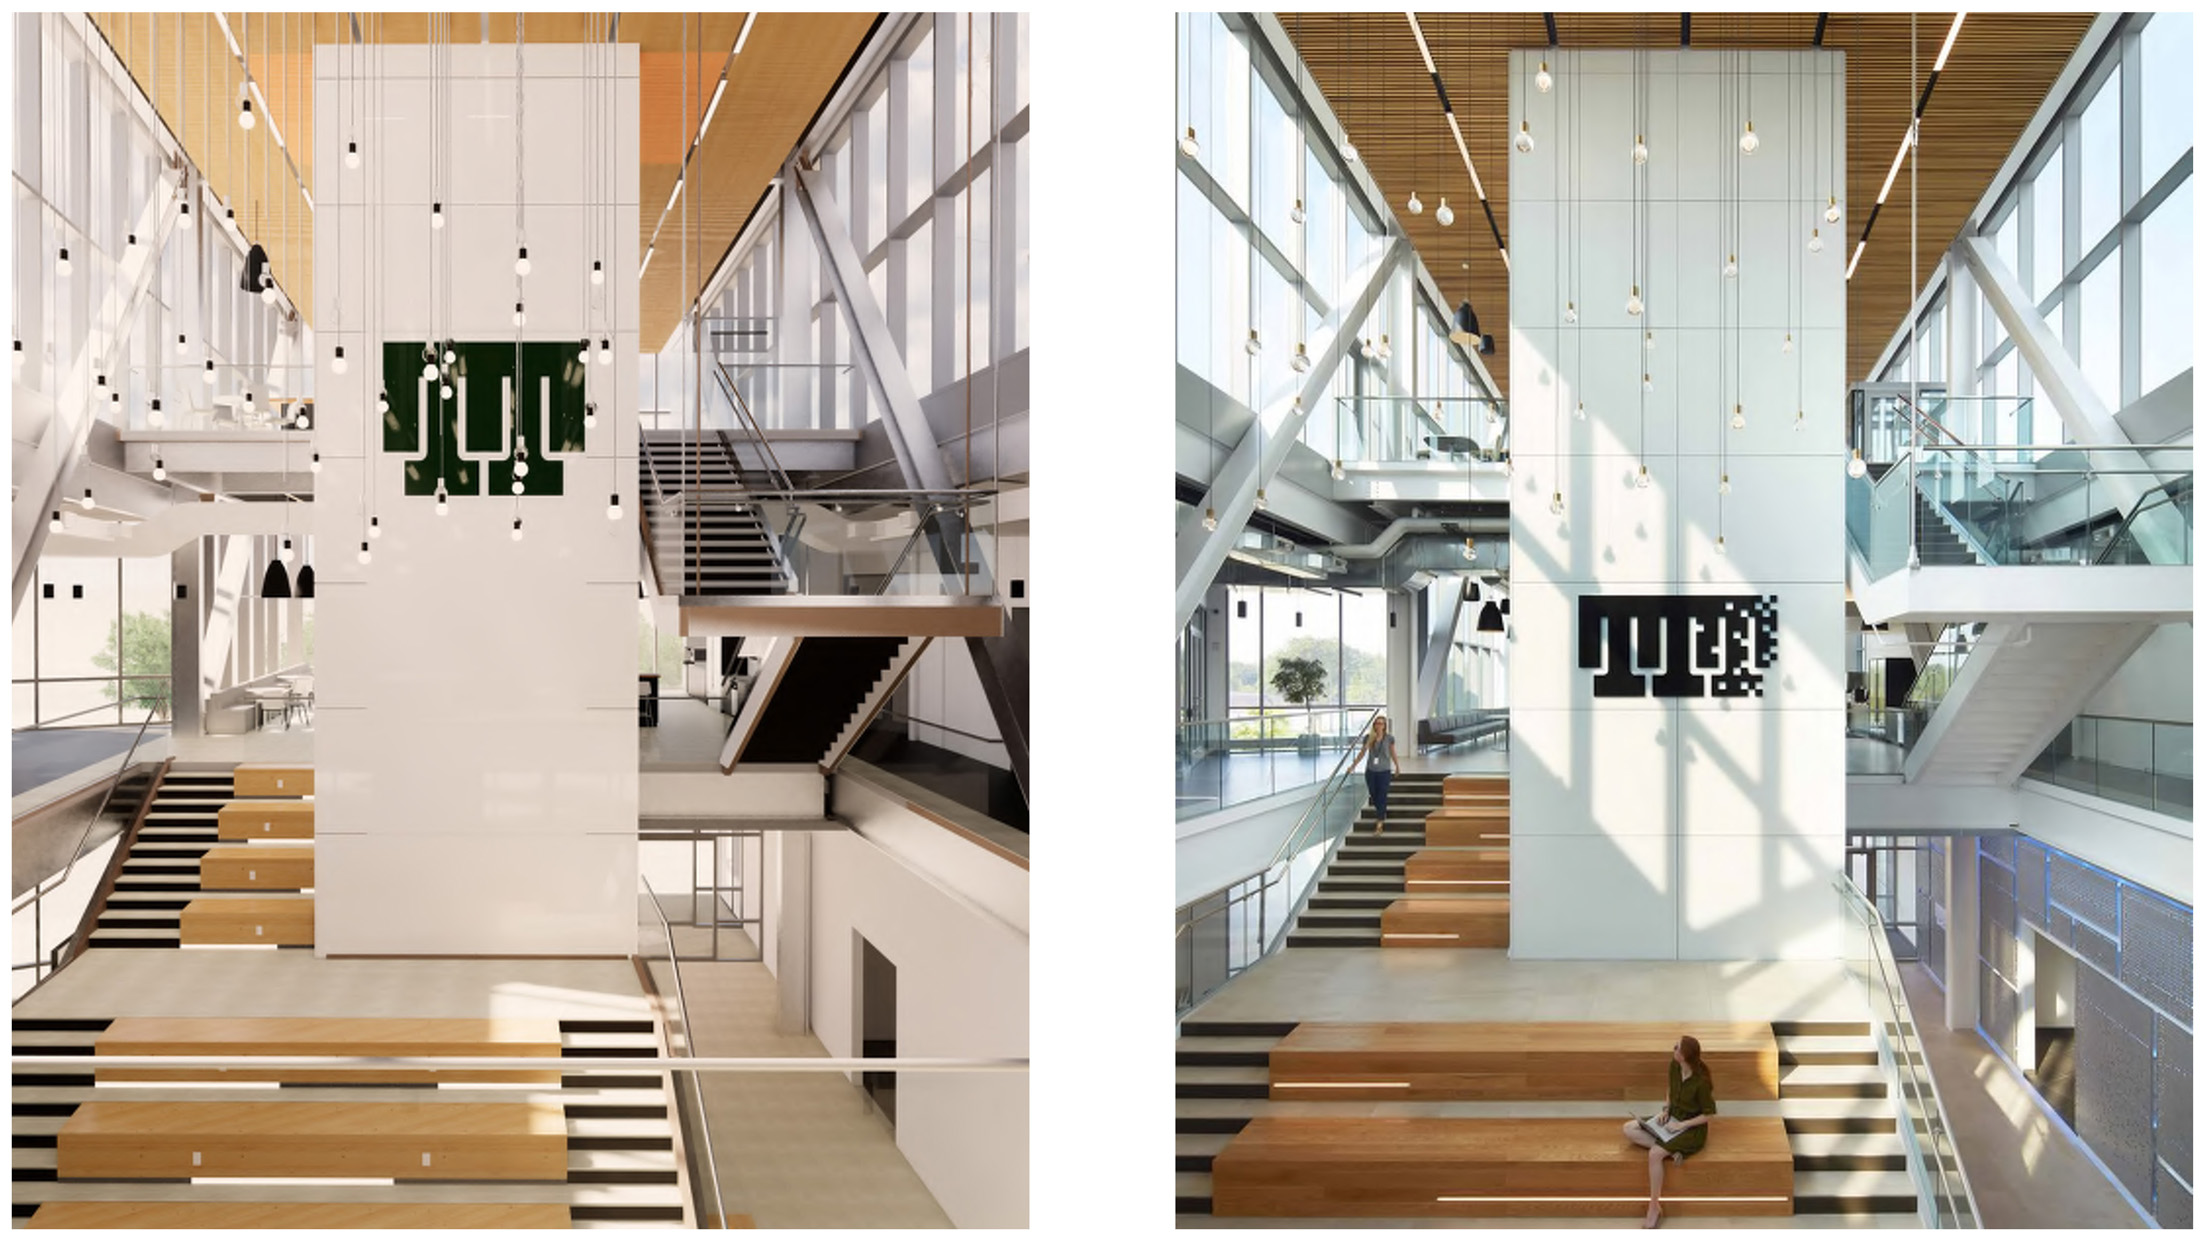
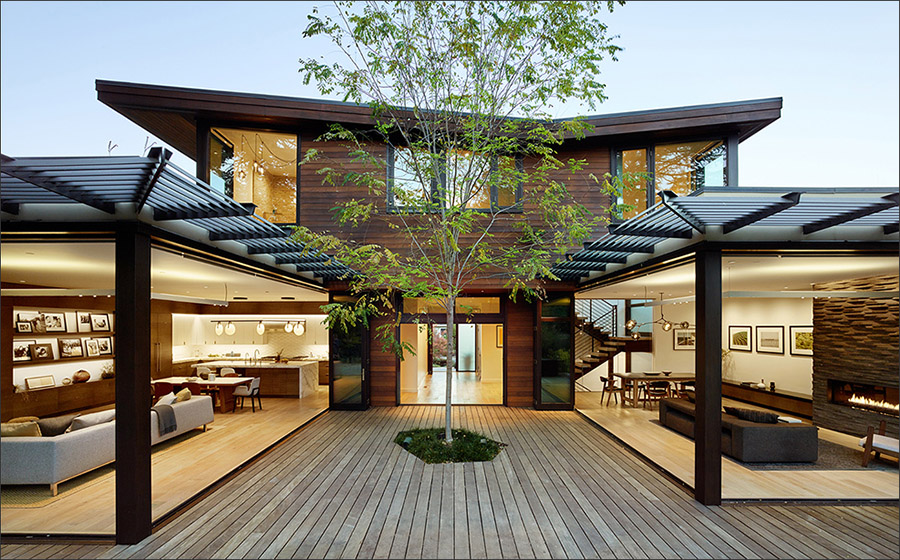
The use of Enscape by AEC firms is rapidly gaining momentum. In AECbytes alone, many of the firms and projects that were recently profiled described how they were using Enscape for its real-time rendering capabilities, including Lucy Cavendish College, Cambridge University, William Duff Architects, ACPV (Antonio Citterio Patricia Viel), The Momentary, and SGA. In fact, the quality of the renderings that was achieved with Enscape was so good that none of these firms mentioned using any other application for visualization. Figure 1 shows an example from SGA’s profile showing how close their real-time Enscape rendering of a project came to the finished construction.
For an application that is so widely used, Enscape is relatively recent — it was launched only in 2017. I was first introduced to it at NVIDIA's 2019 GTC conference, where its use by the firm Kohn Pedersen Fox (KPF) — an early adopter and advanced user of AEC technology — was being showcased. Its dramatic uptick in the AEC industry since then is heartening, not just for Enscape but also for motivating other technology startups, showing that you really "can't keep a good thing down."
Enscape has only one installer rather than separate installers for the five different applications it supports. So, when you install Enscape on a computer, you automatically install the plug-ins for all the supported applications that are available on that computer. Another key point to note is that you can only launch Enscape from within the applications it is plugging into. In other words, it is well and truly a plug-in rather than an independent application that can be run on its own.
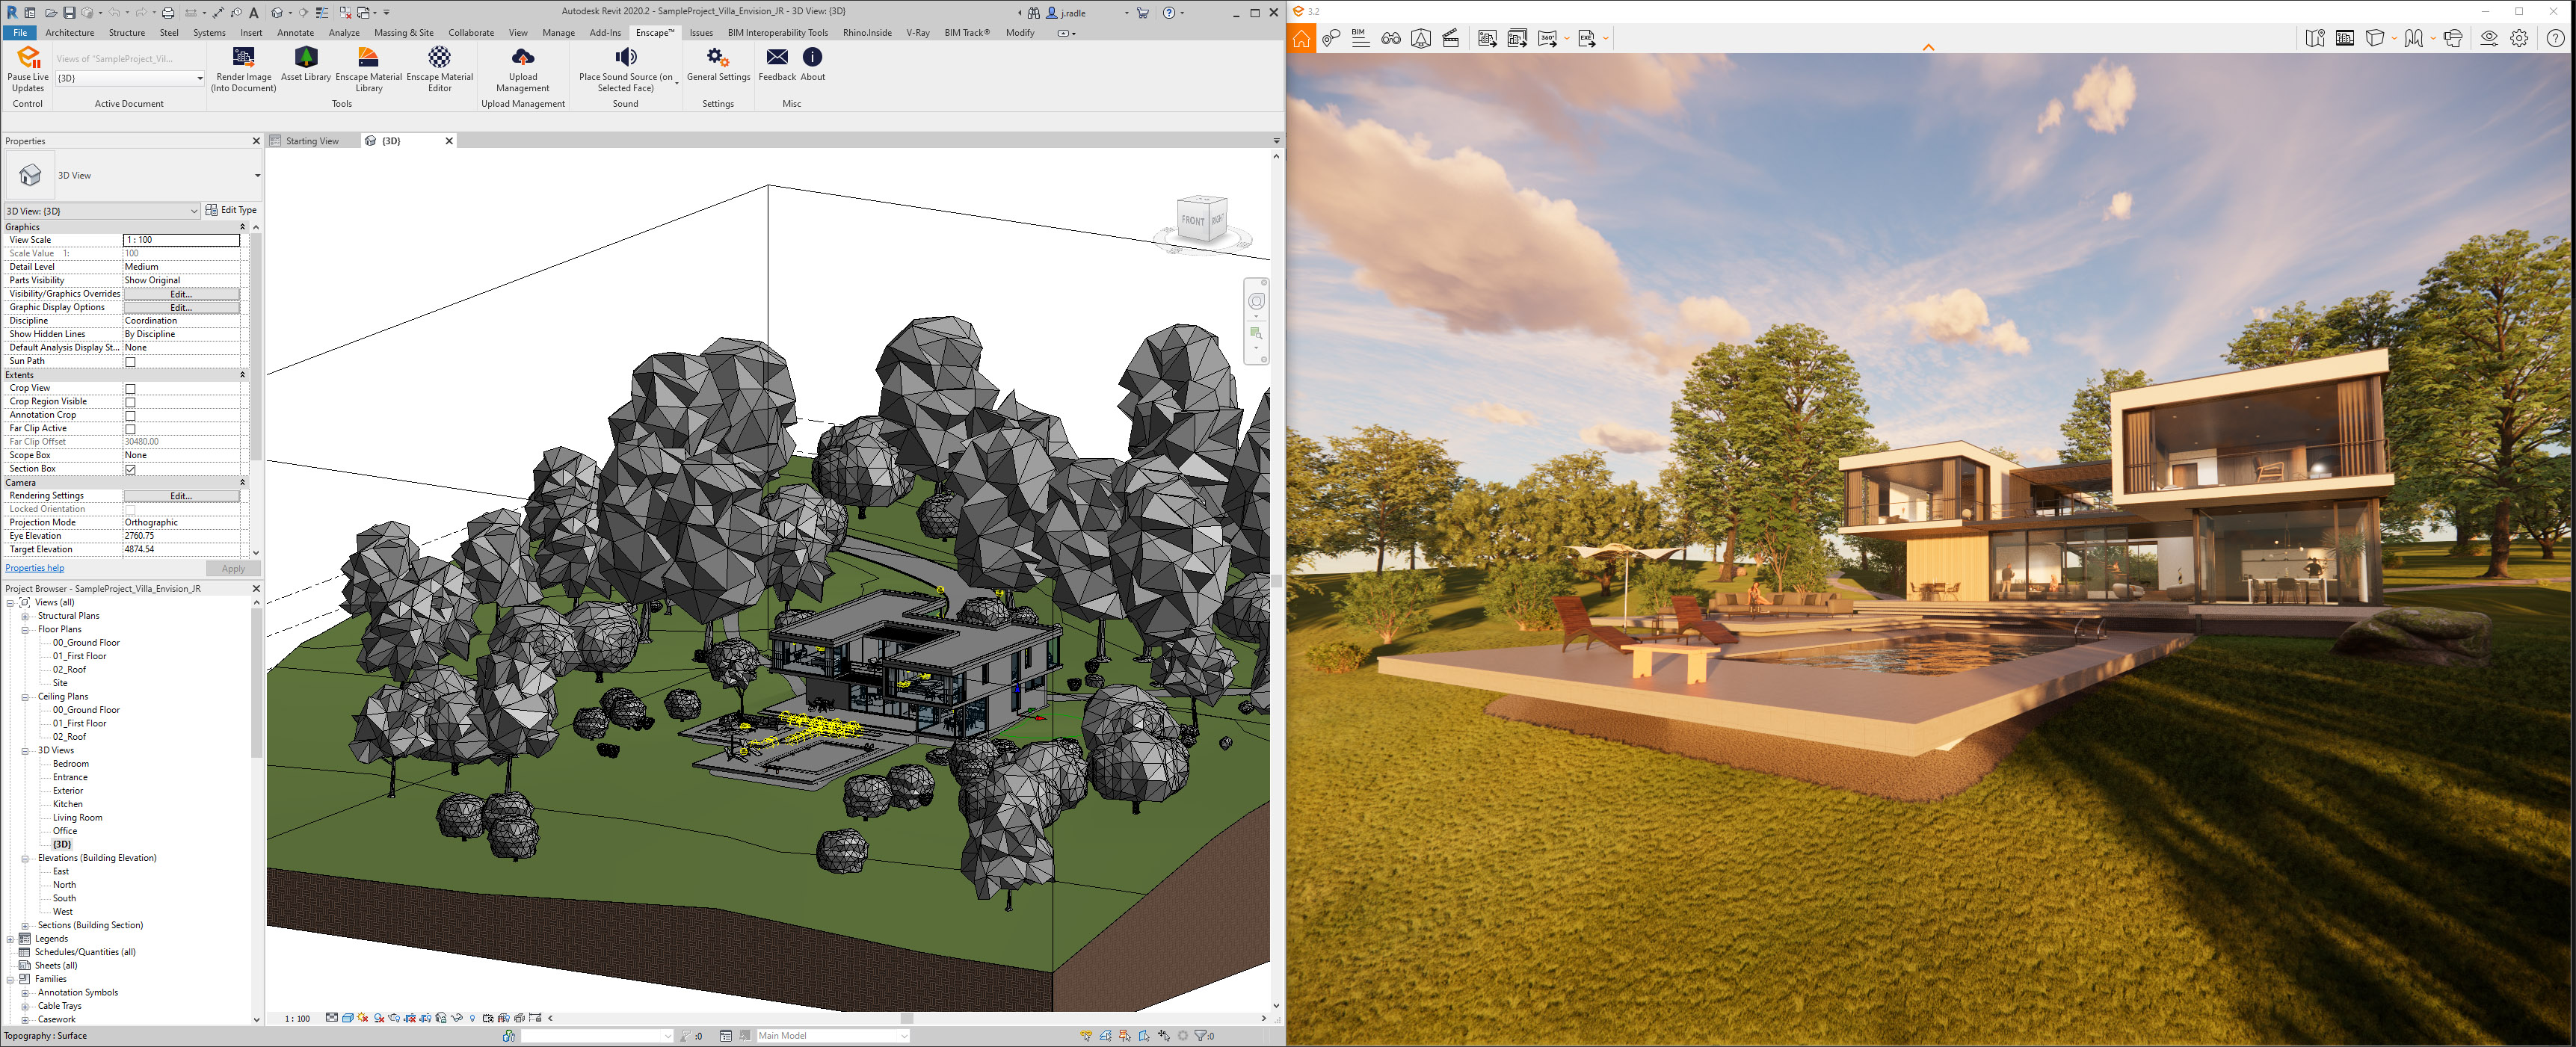
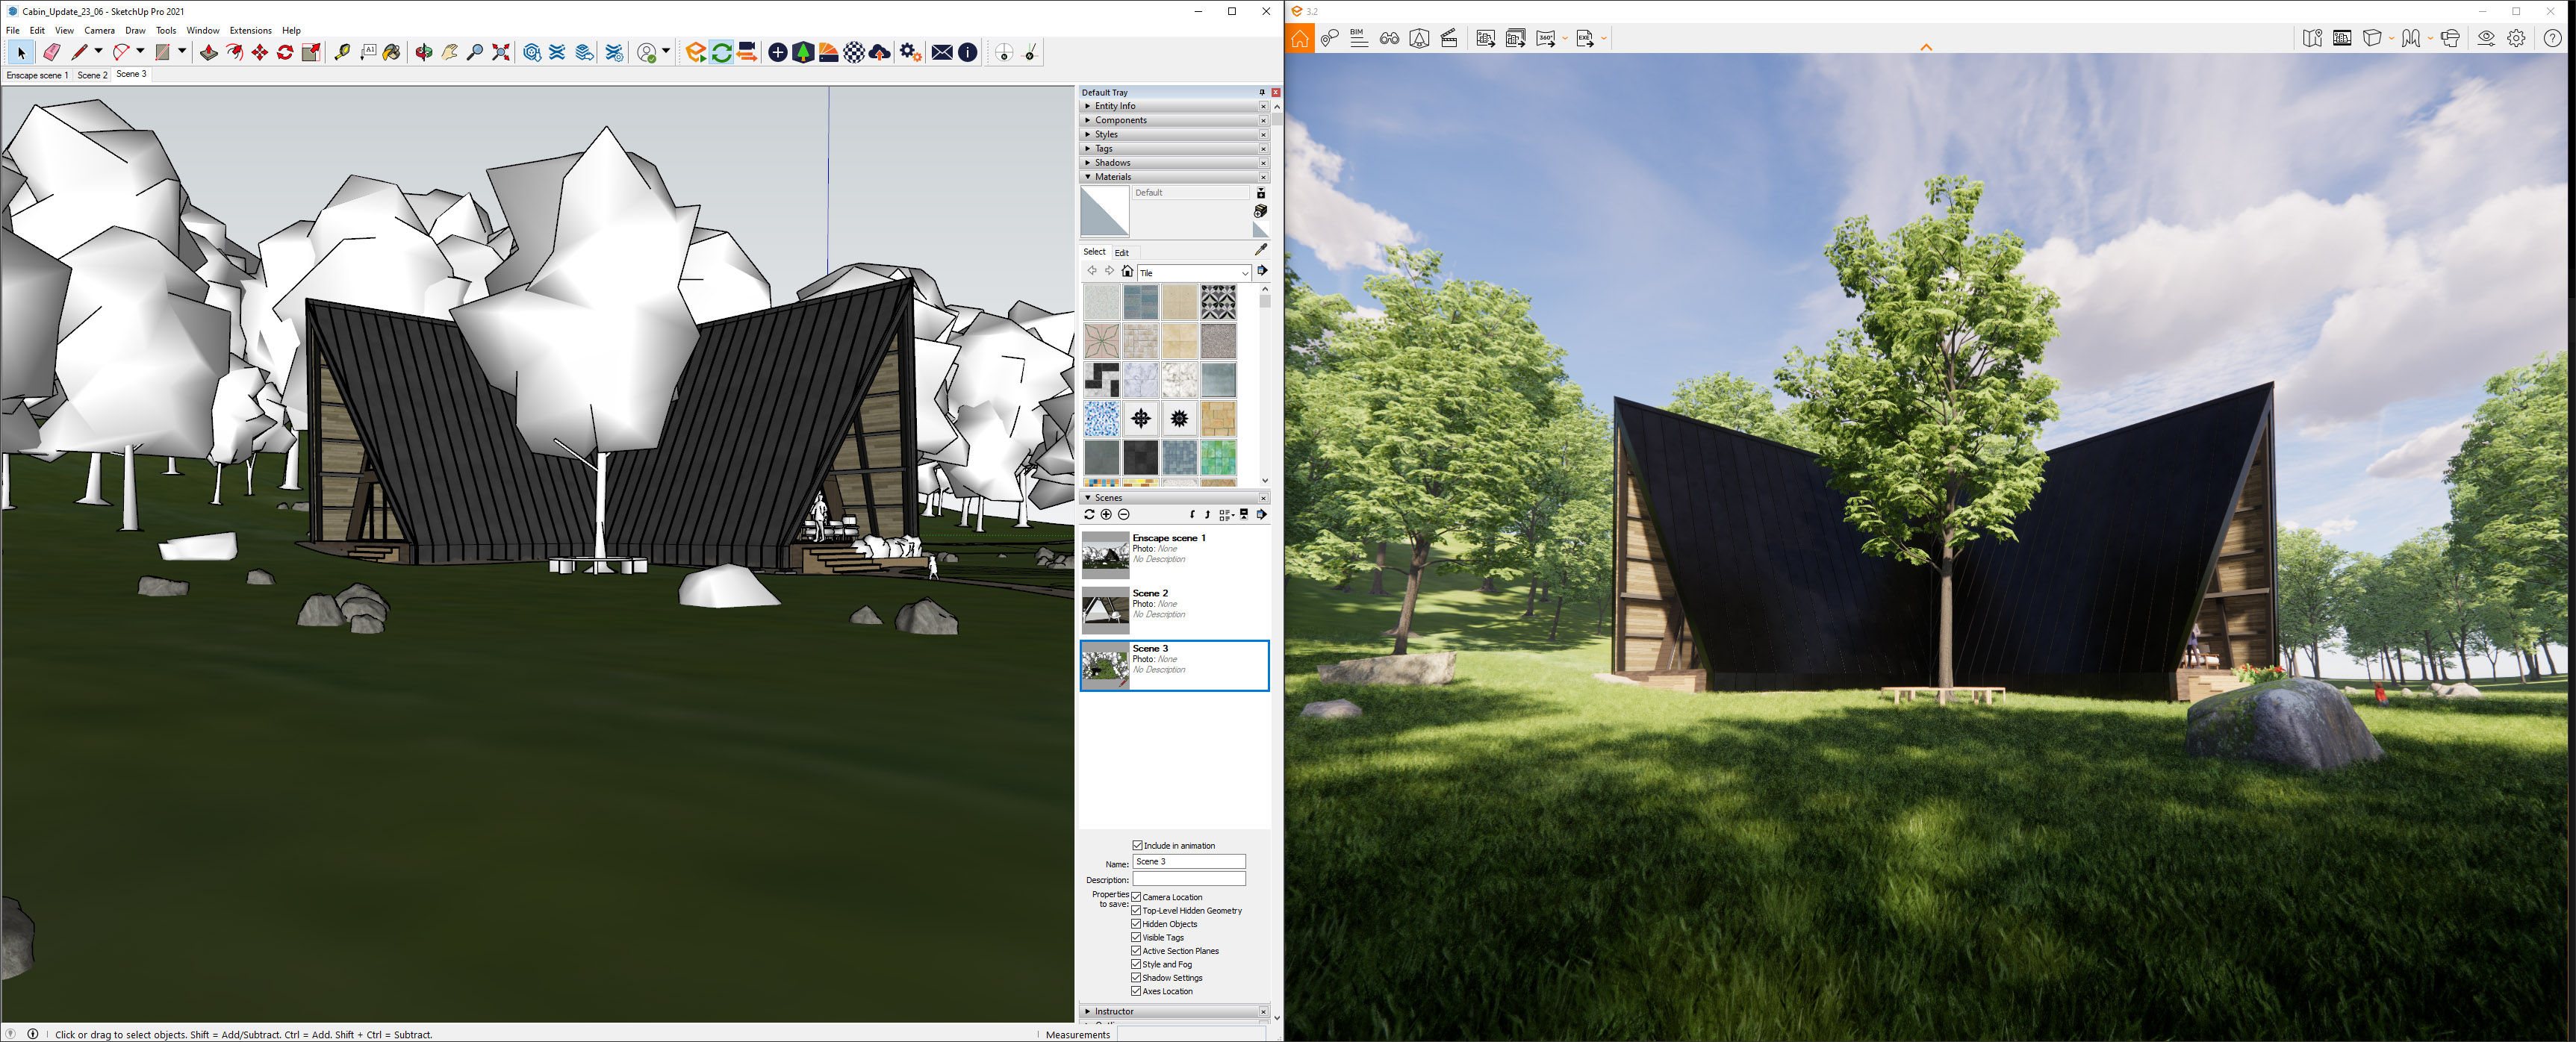
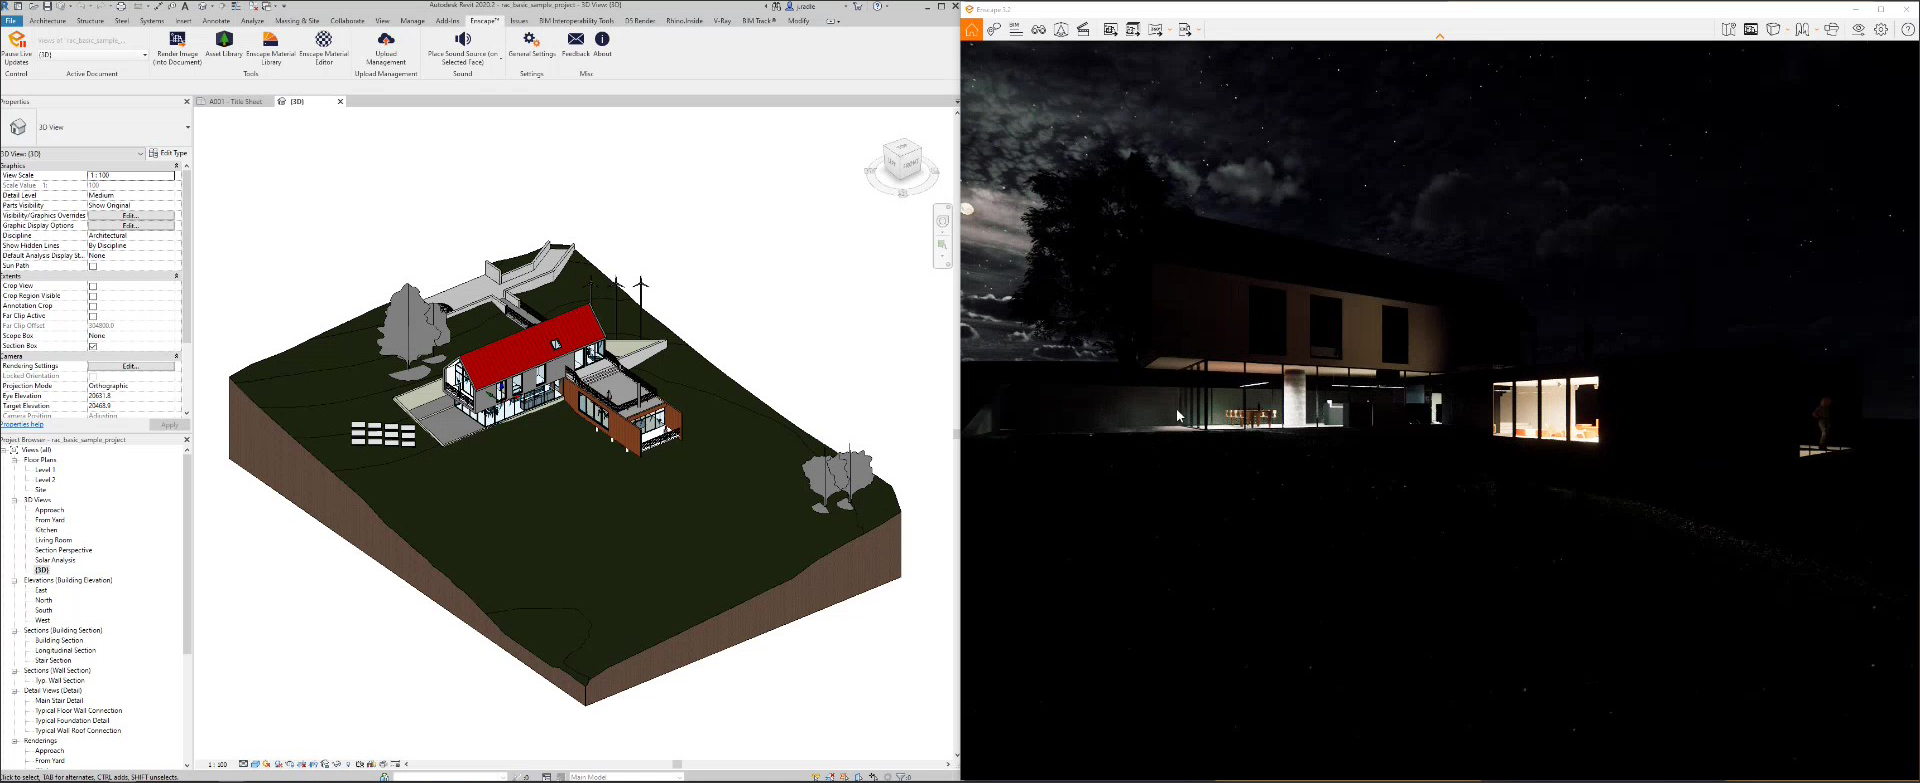
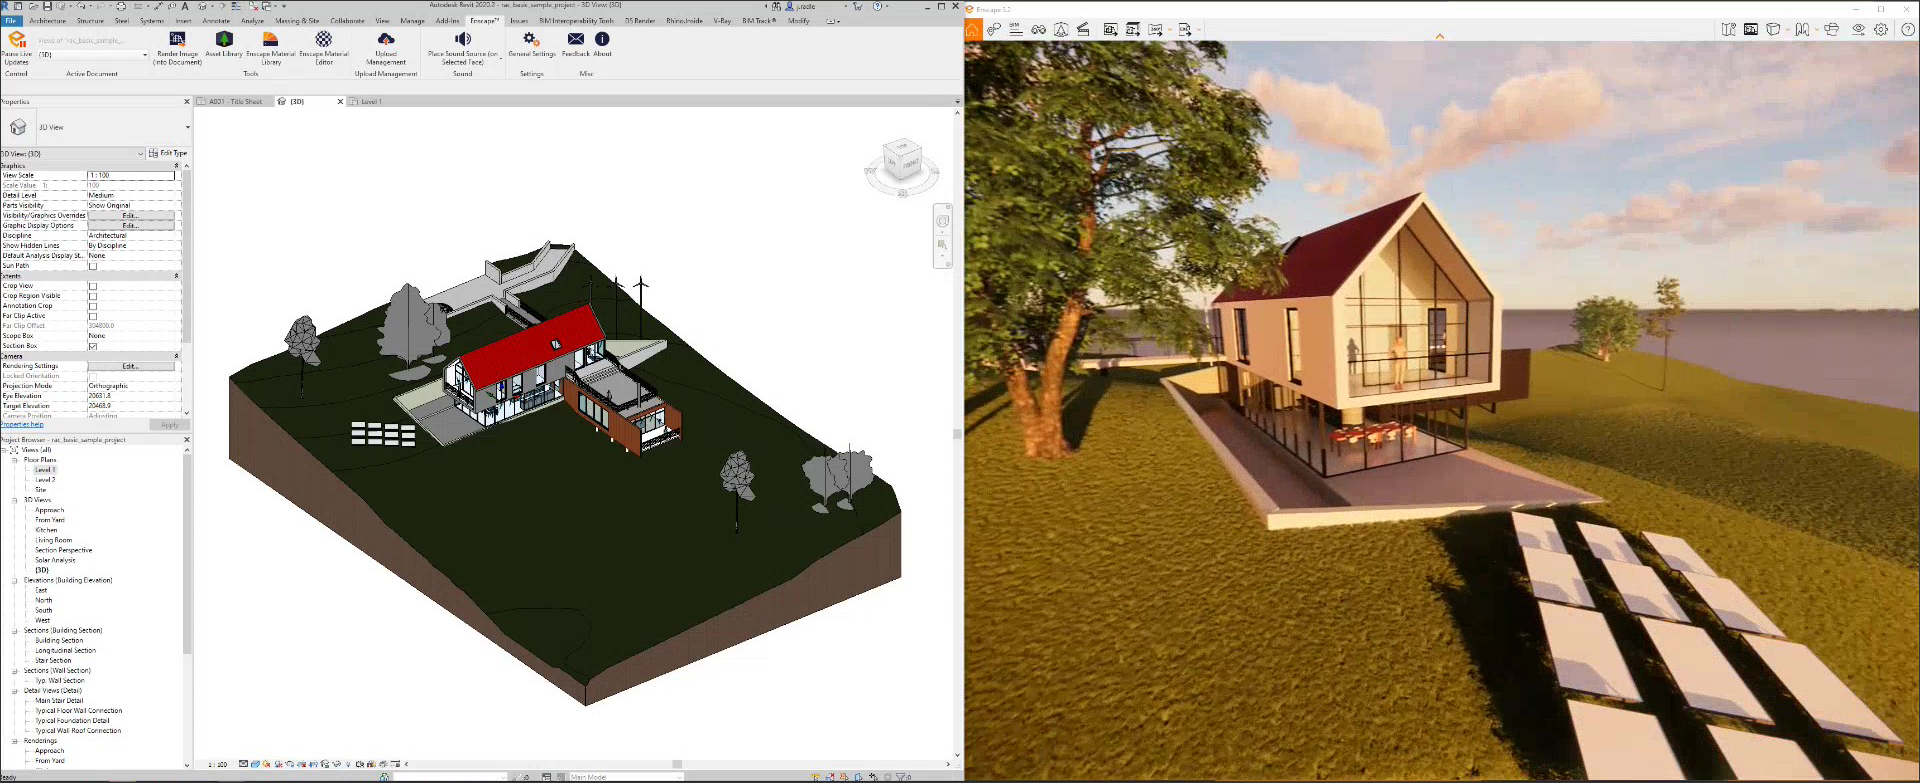
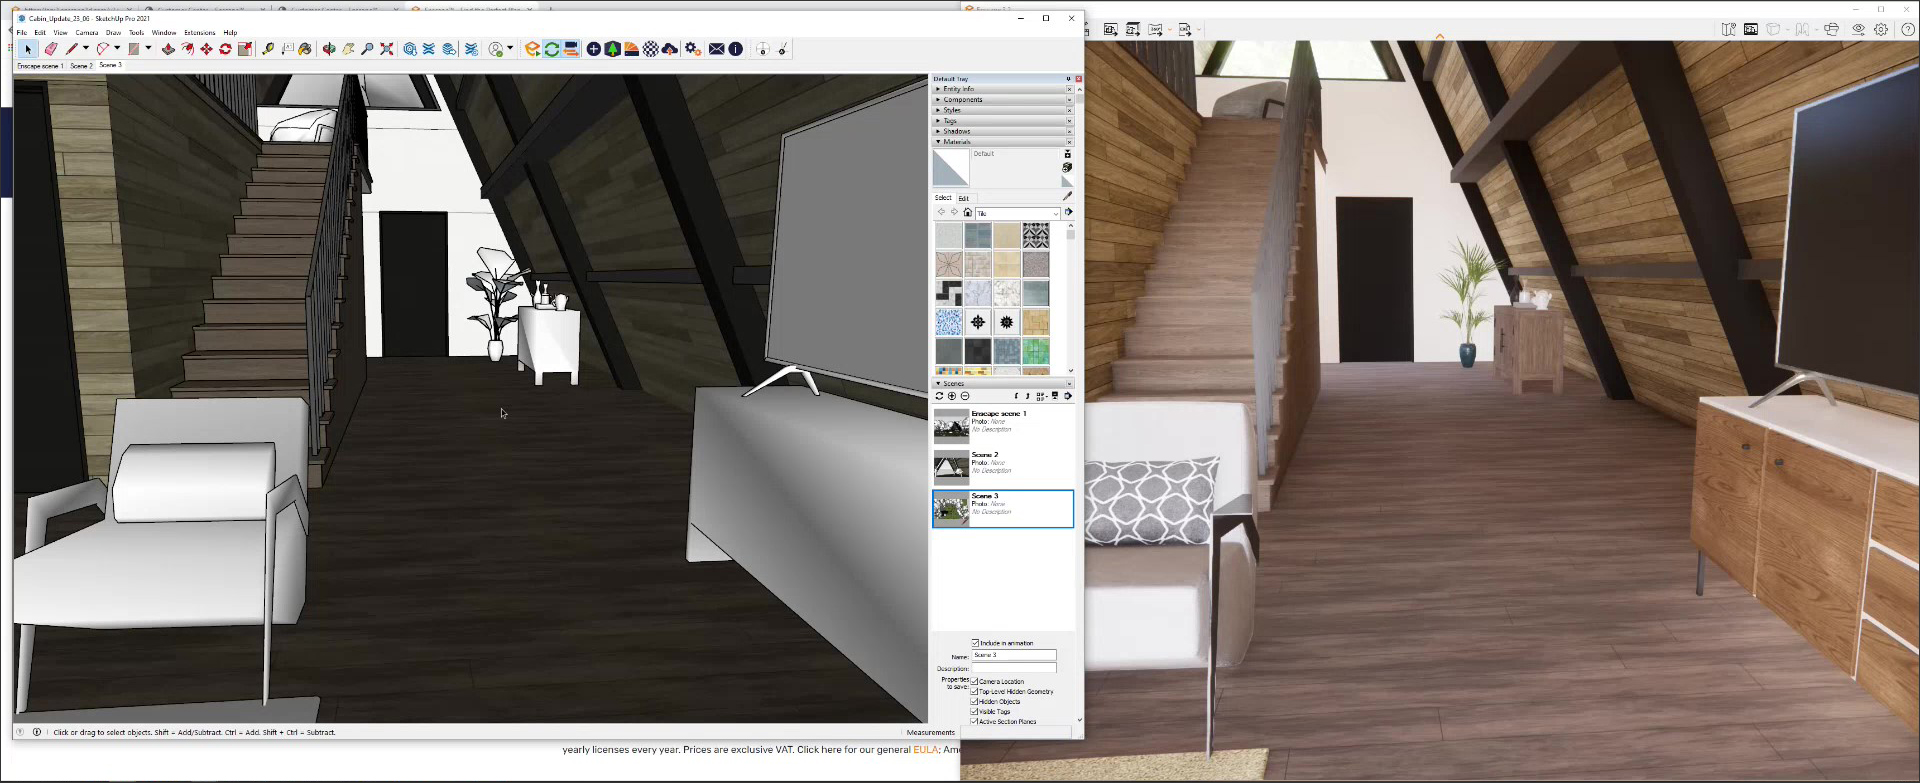
Once the Enscape plug-in is installed and launched from the design application it is going to be used with, it opens up with the current view of the design model, rendered using the material information, location information, sun settings, and other properties of the model. Images of the Enscape plugin working with Revit, SketchUp, and Archicad are shown below. The Enscape window is typically positioned alongside the model window so that any changes made to the model can be immediately seen — it is almost like having a 3D window of the same application open on the side, so you can visualize what you are modeling in real-time.

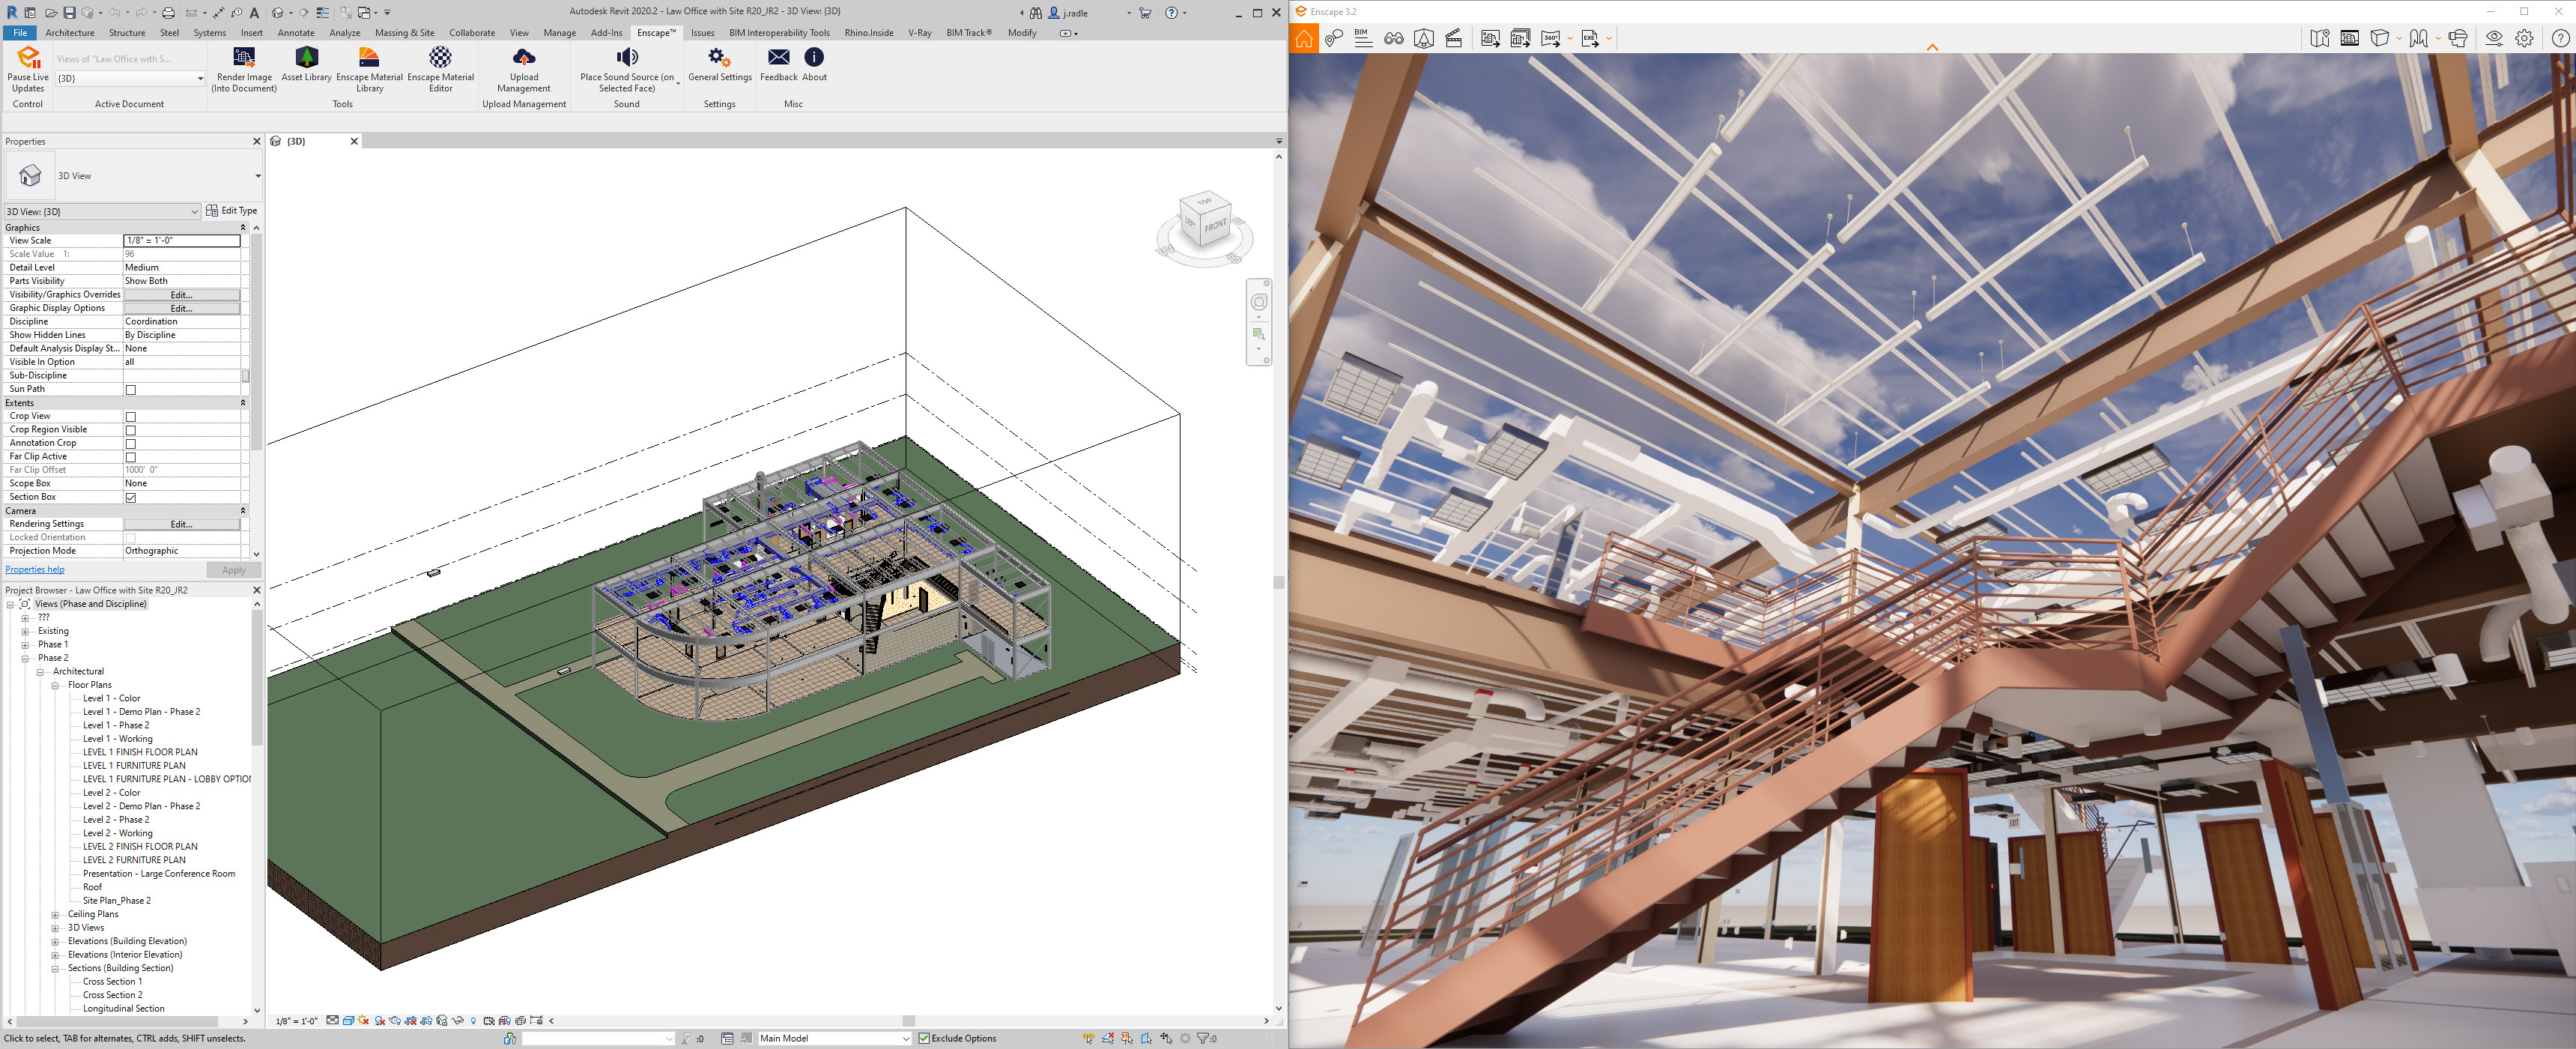
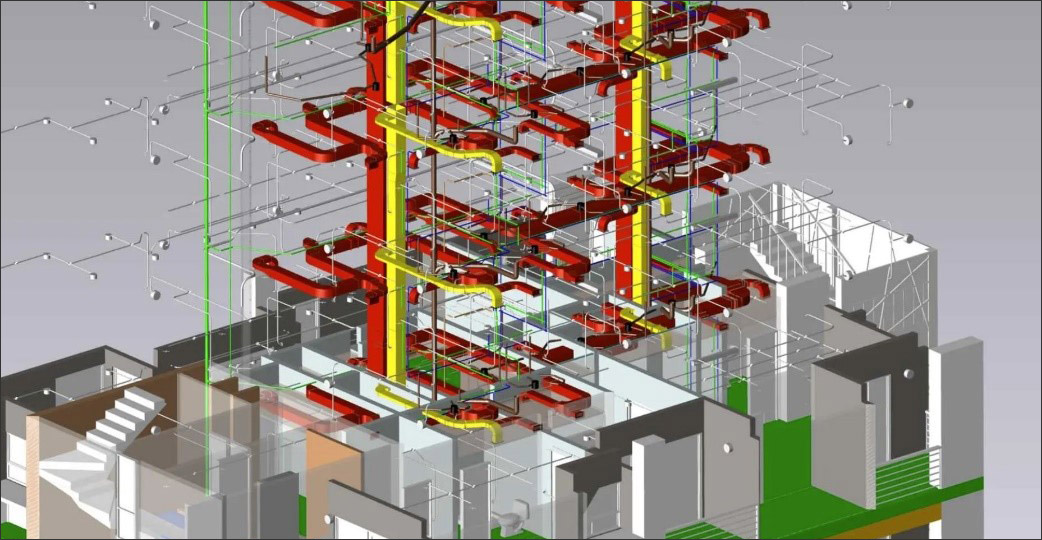
It might seem as though Enscape is primarily used for architectural visualization, but as shown in Figure 5, it can also be gainfully used by engineers to get a better understanding of their designs. They can use different rendering styles in Enscape such as a white mode which doesn't render textures (shown in Figure 7), or they can have their elements color-coded based on the color system they used for their designs.
Since the link between the design application and its Enscape plug-in is live, any changes made to the model are immediately reflected in the Enscape window, as shown below — there is no “Update” button that needs to be clicked.
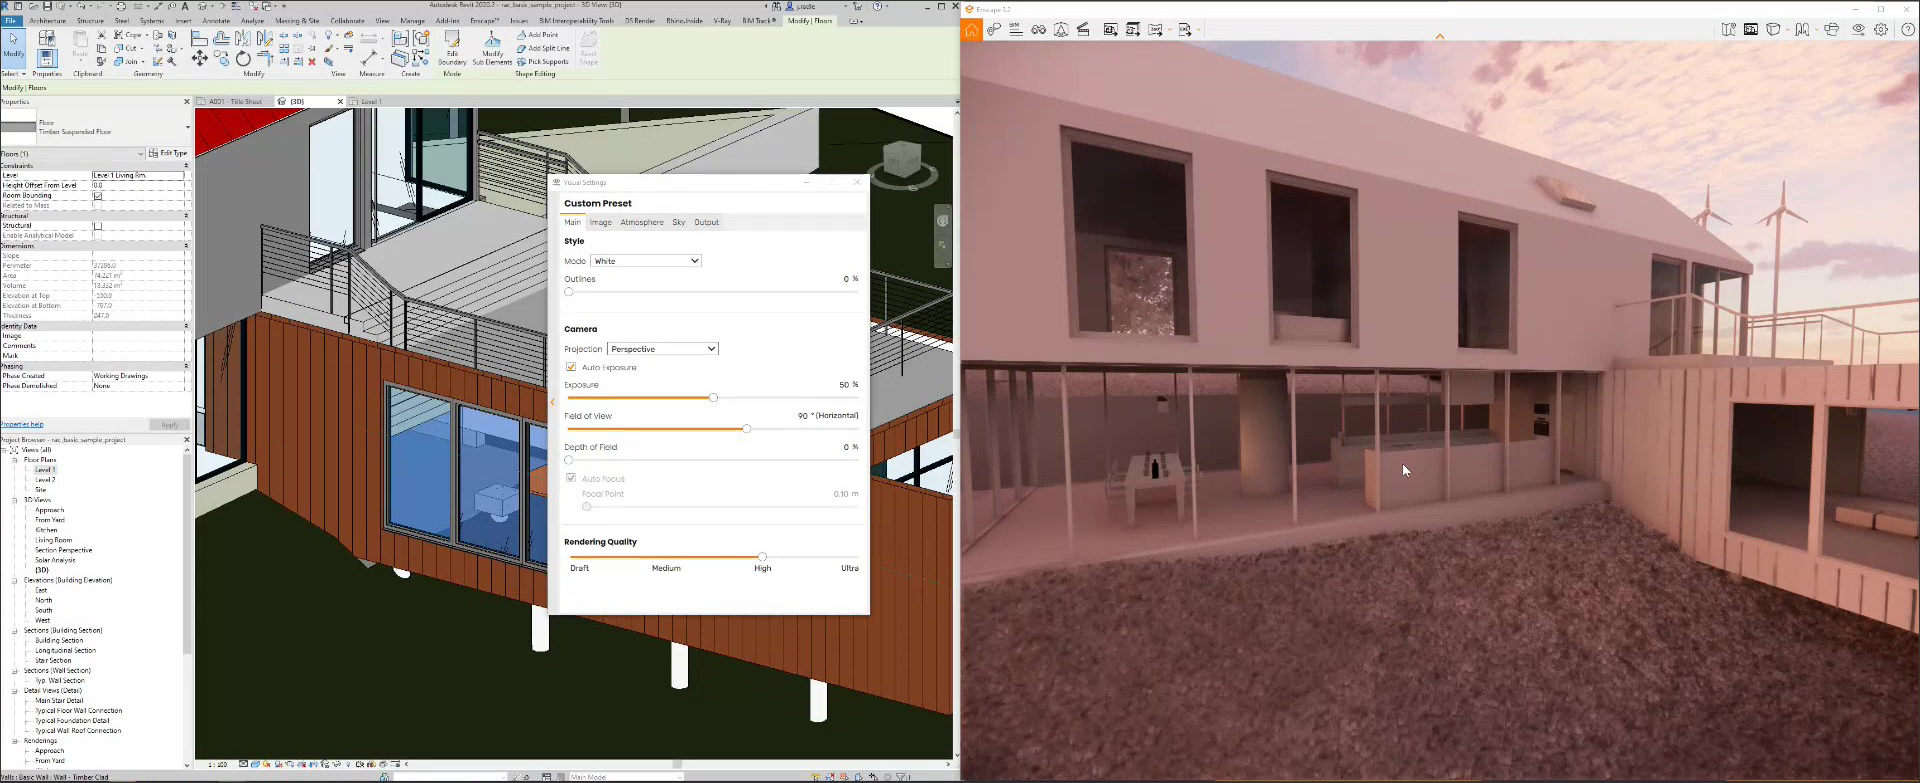
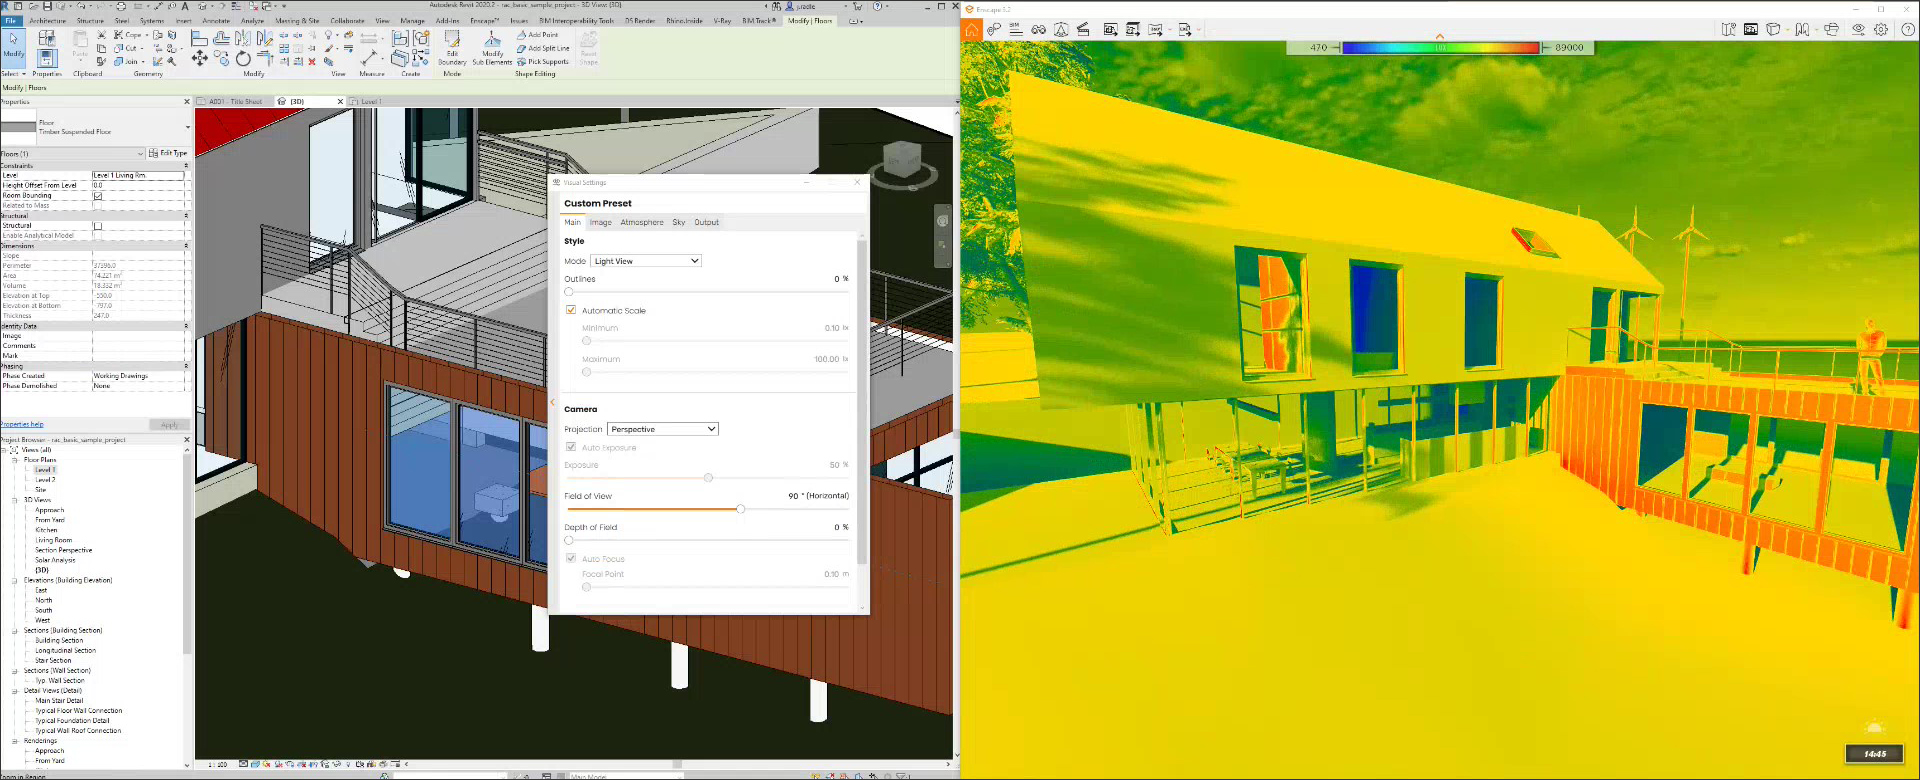
While Enscape launches with the view currently active in the model, you can subsequently navigate the model independently in Enscape and interactively change rendering settings such as the time of day, horizon line, sky, fog, night-time settings, etc. This is done in the Visual Settings tab, shown in Figure 7 with two different Style settings: White mode, which does not show any textures; and Light View, which displays a heat map showing the light intensity in different parts of the model at different times of the day. The position of the sun can be changed interactively, so the heat map as well as shading can be animated. (While Enscape is not a lighting analysis application with 100% accuracy of the lighting calculations, it does provide the designer with a good visual idea of areas of the design that might be overheated.)
For a night shot, Enscape uses the light fixtures and their illumination settings that are specified in the model. You can also set the model to any specific time of day by selecting it in the model and immediately see it reflected in Enscape since the connection between the model and the rendering is live.
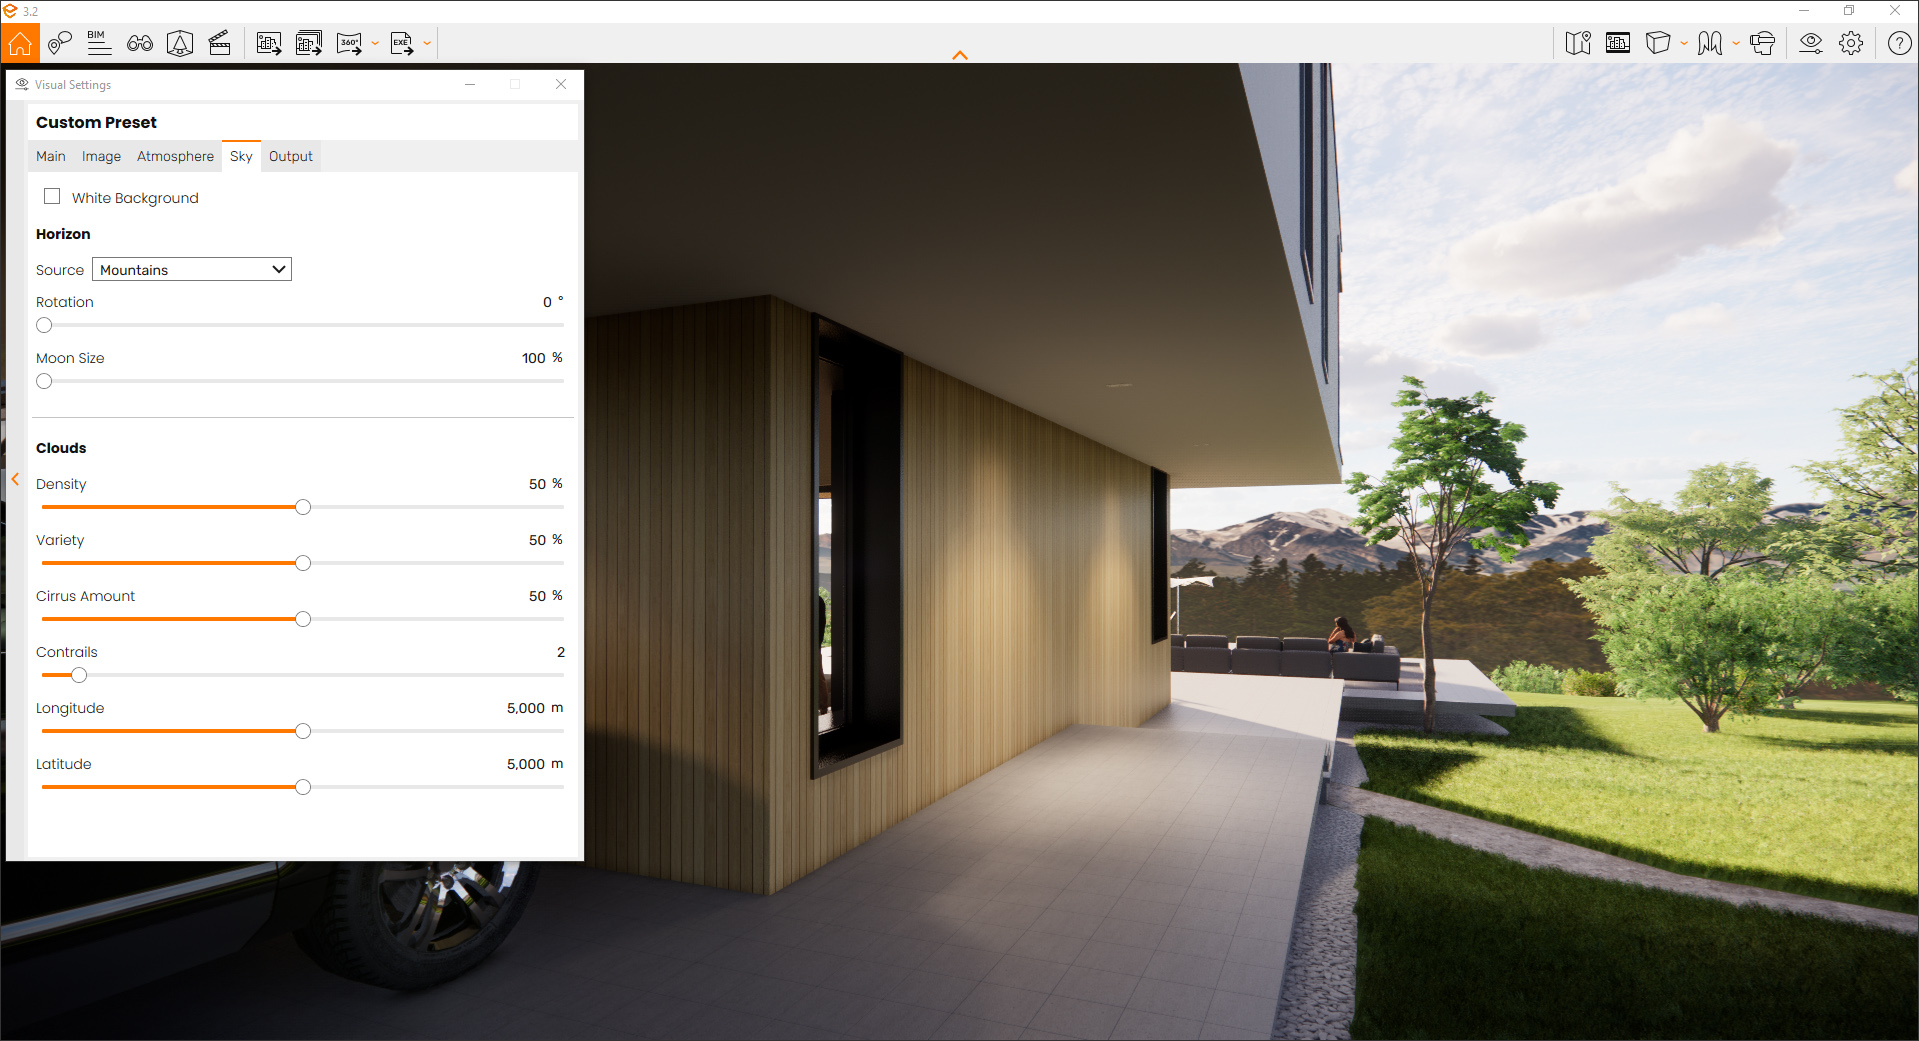
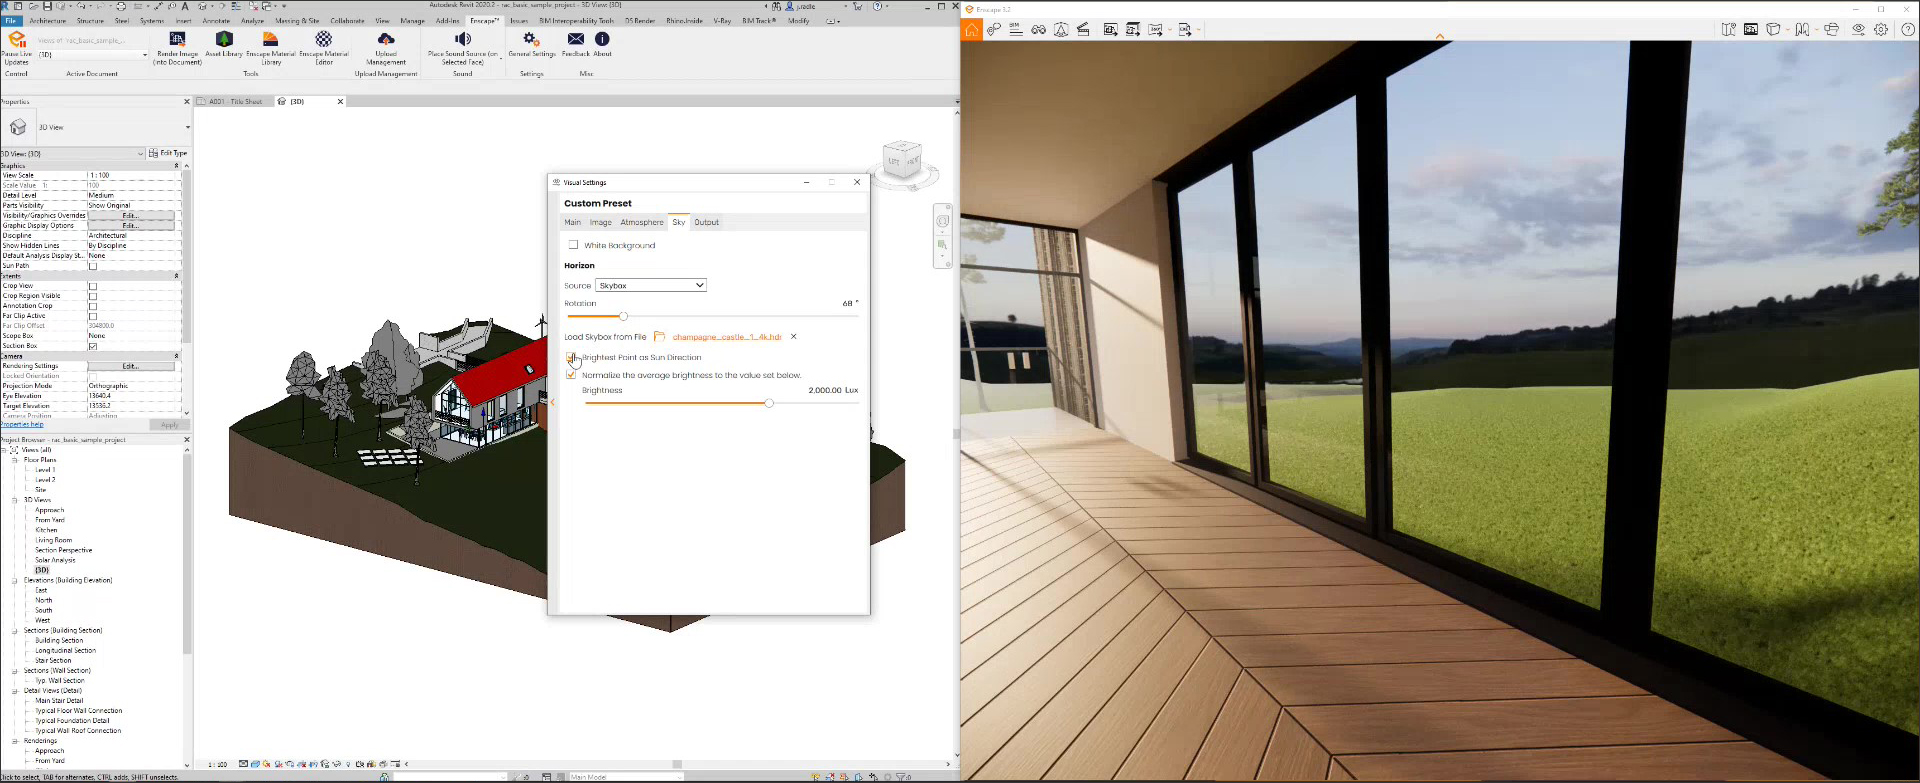
In addition to the rendering style, other visual settings that can be adjusted in Enscape include different atmospheric effects such as fog, horizon, illumination, brightness, clouds, etc., as shown in Figure 9, allowing the rendering to be fine-tuned as required. For the horizon, you can also specify a custom Skybox image, generated from Google Earth or a drone capture, enabling the client to see exactly what the surroundings would look like from any part of the design, as shown in Figure 10.
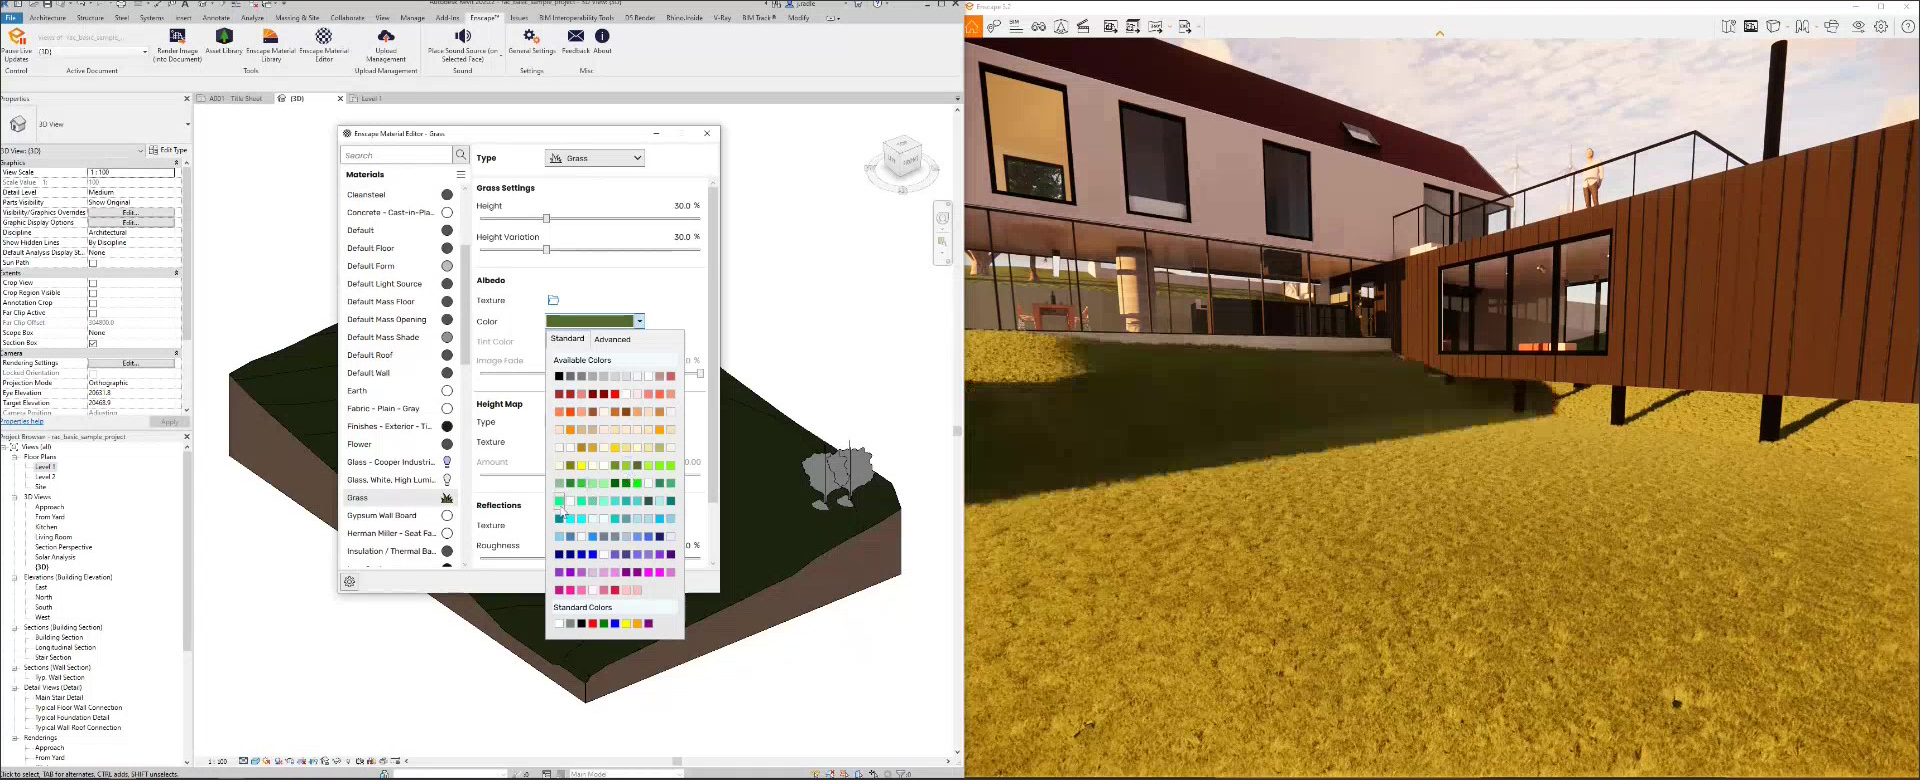
The materials that Enscape uses in the rendering come directly from the authoring application. There are default mappings, such as Grass to Grass for example, but custom mappings can be specified as shown in Figure 11.
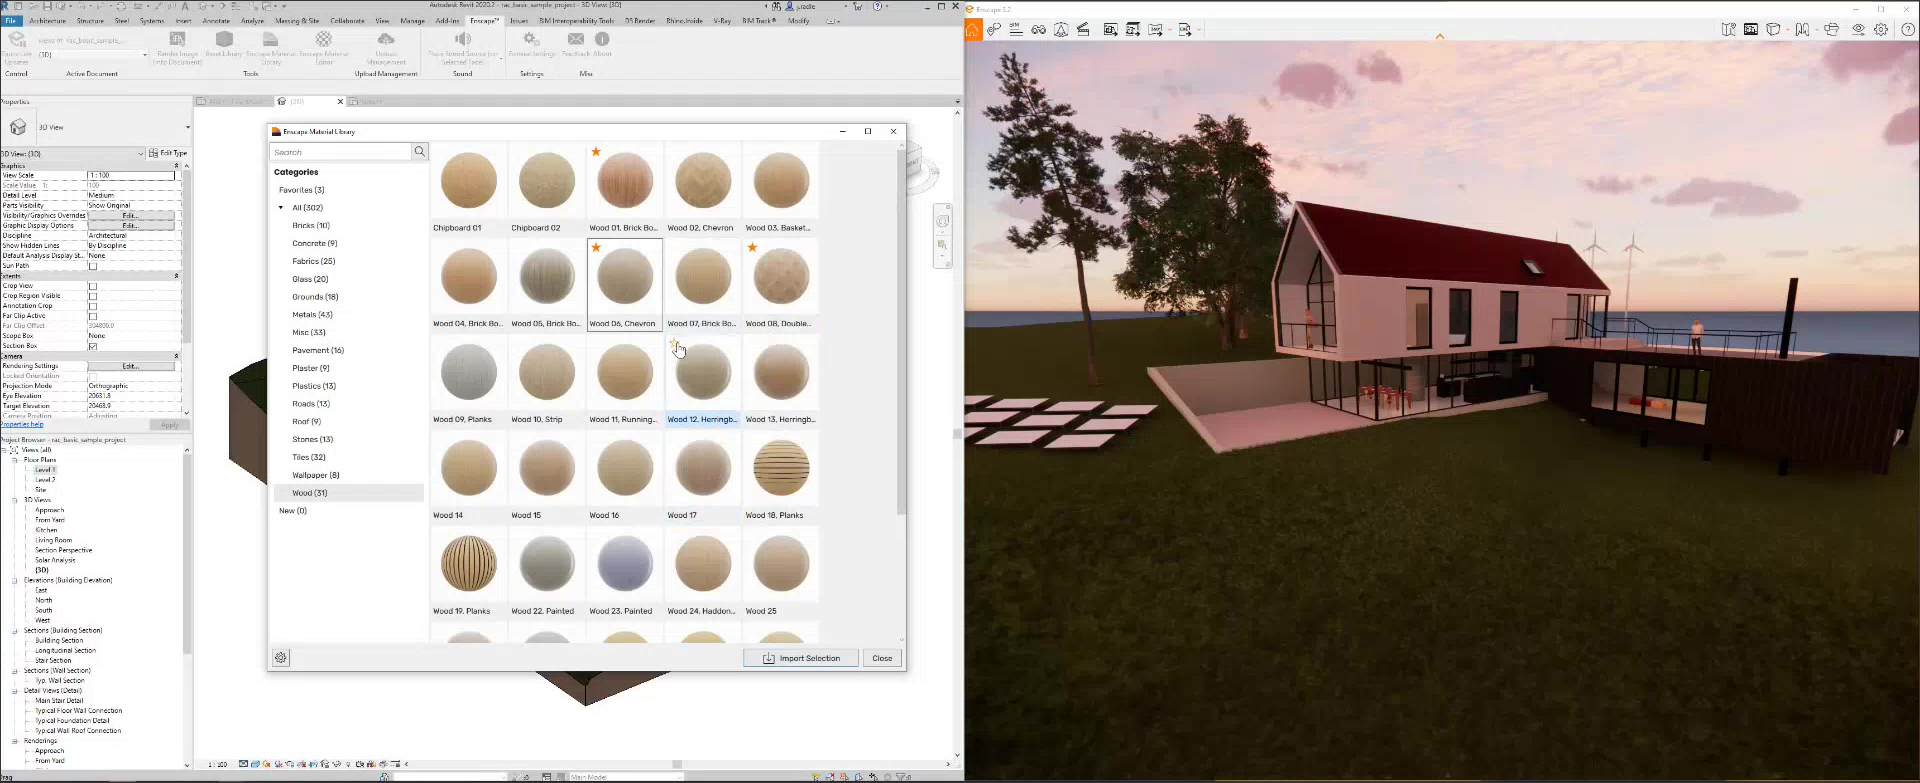
The reverse also works, where you can use Enscape materials and have them become part of the design model. This is a new feature that was recently introduced in Enscape. As shown in Figure 12, you can select a material in the Enscape Material Library, import it into the design application so it becomes a native material, apply it to an object, and see it in the Enscape rendering in its full glory. Since there is always a one-to-one correspondence between the model and Enscape, what you cannot do is apply materials to objects in Enscape independent of their material definitions in the model. This prevents the problem of having a fabulous rendering and then having to figure out how to specify those materials in the model.
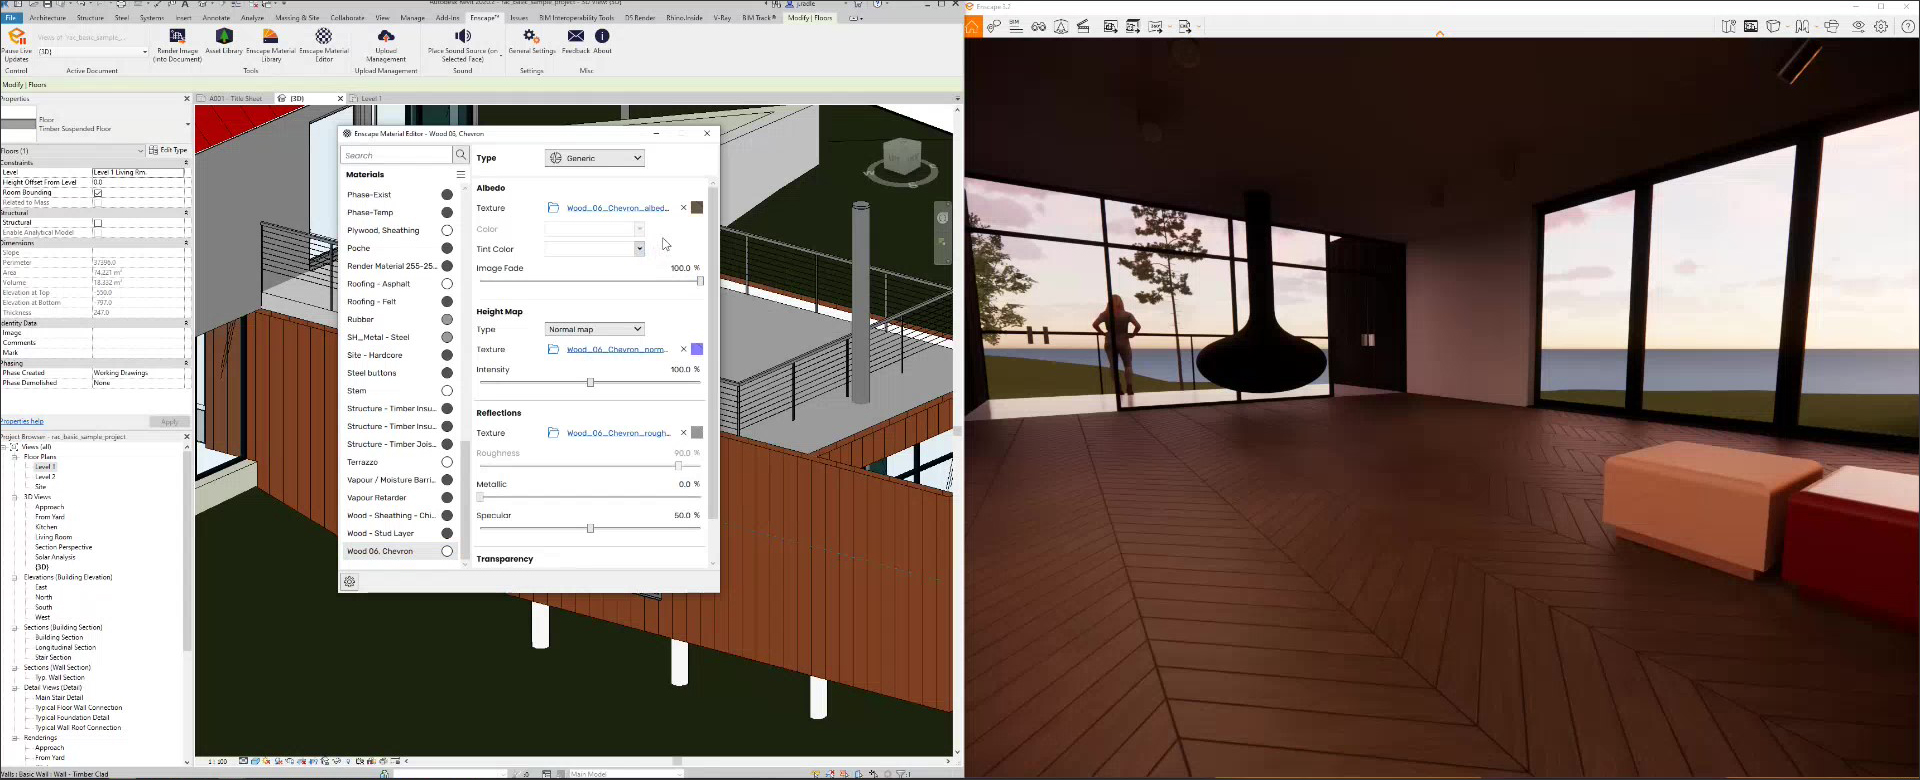
After creating and applying an Enscape material to the model, any changes to the material definition such as colors, bumps, angles, etc., can be conveniently made in the user-friendly, intuitive interface of Enscape Material Editor. The changes are immediately visible in the Enscape window.
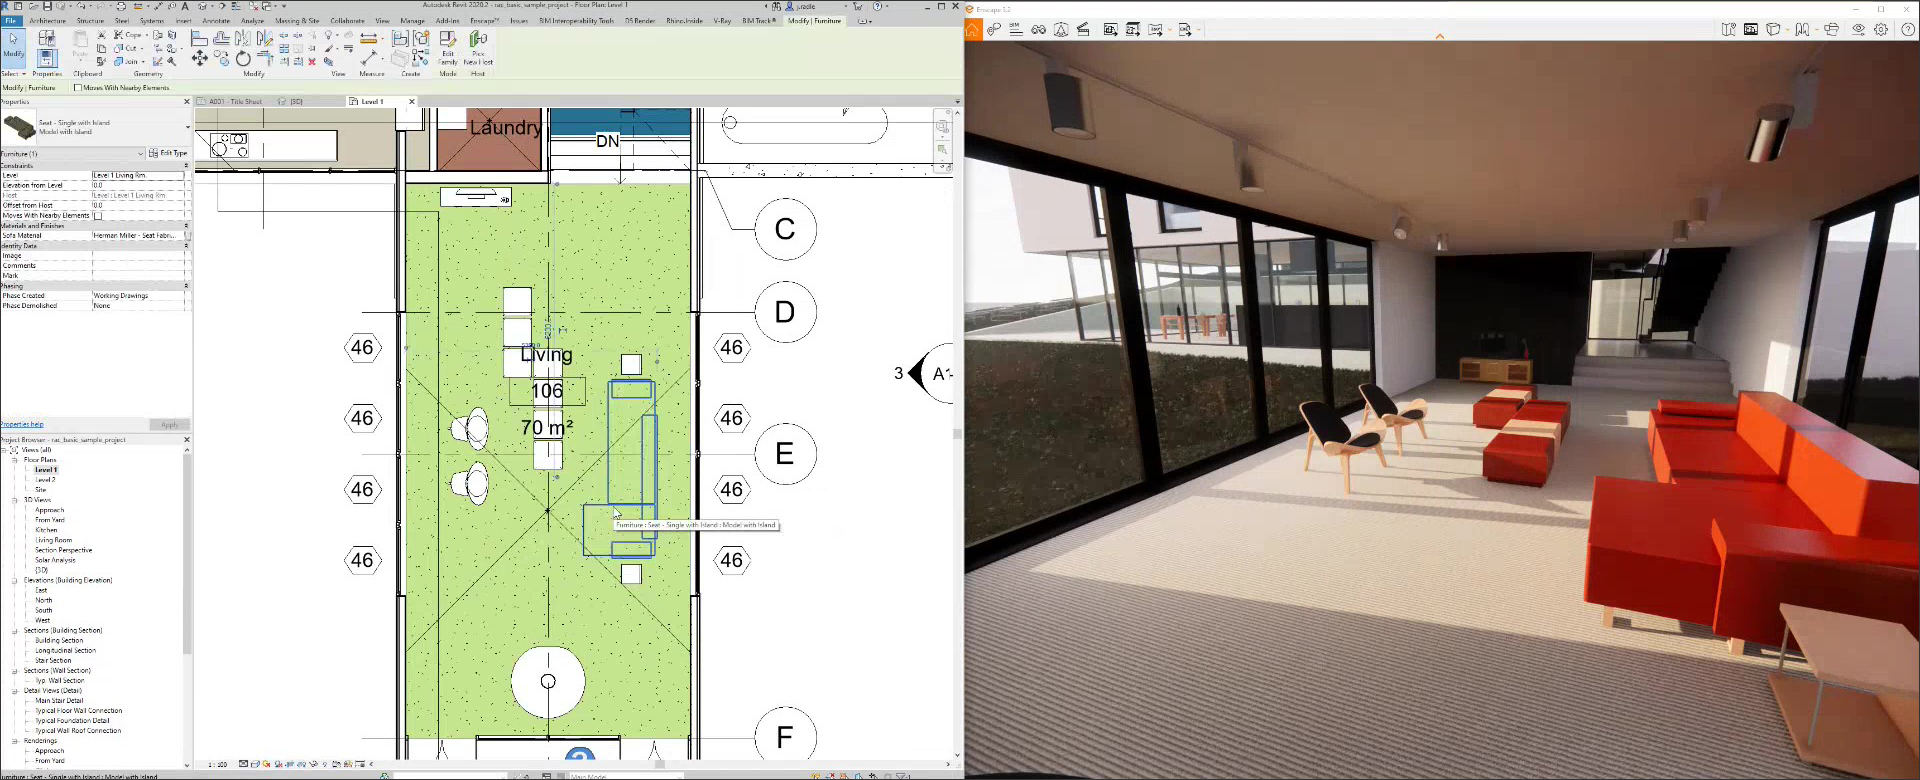
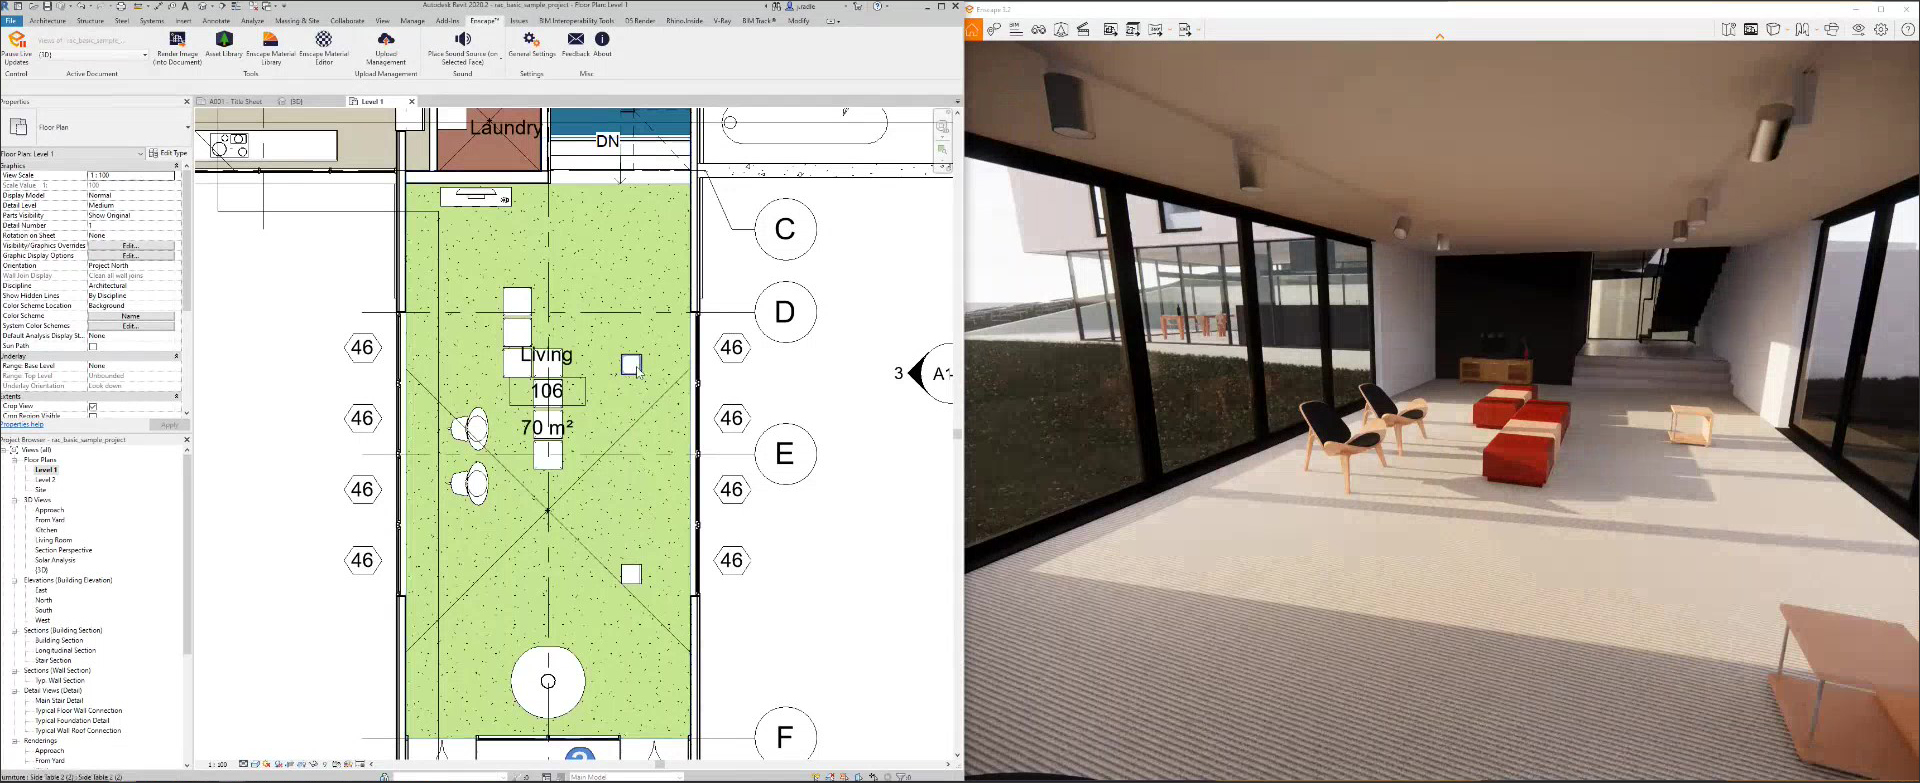
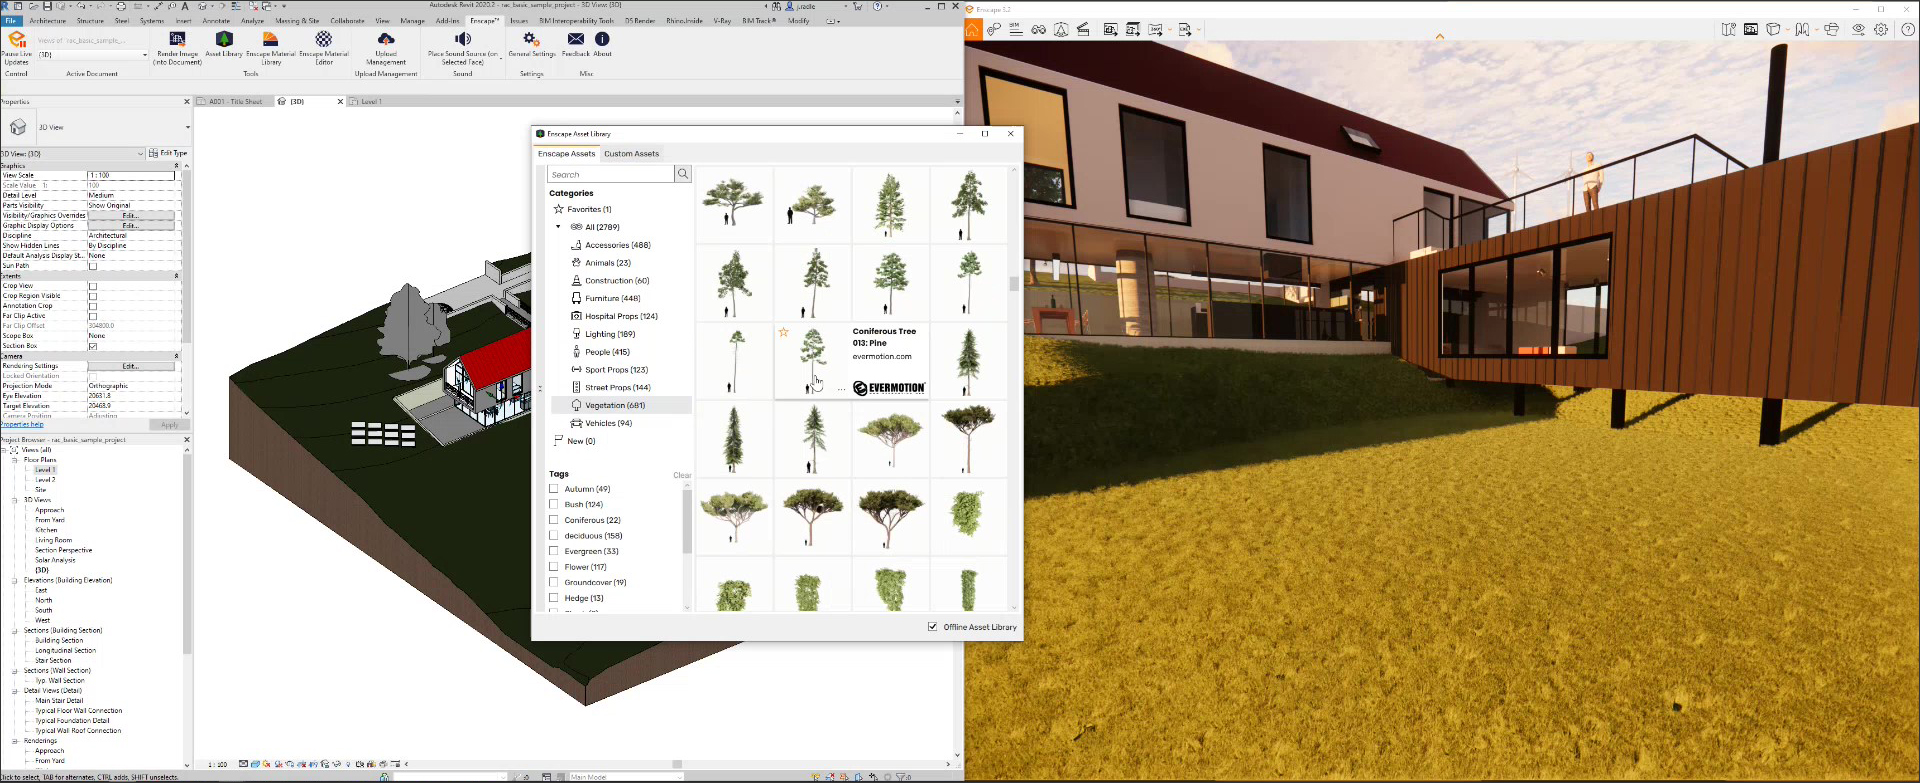
Similar to materials, you can also place assets in the model from the extensive Enscape Asset library. The selected assets are converted to the format of the modeling application so they can be placed in the model, and you can then visualize them in the Enscape rendering, as shown in Figure 14.
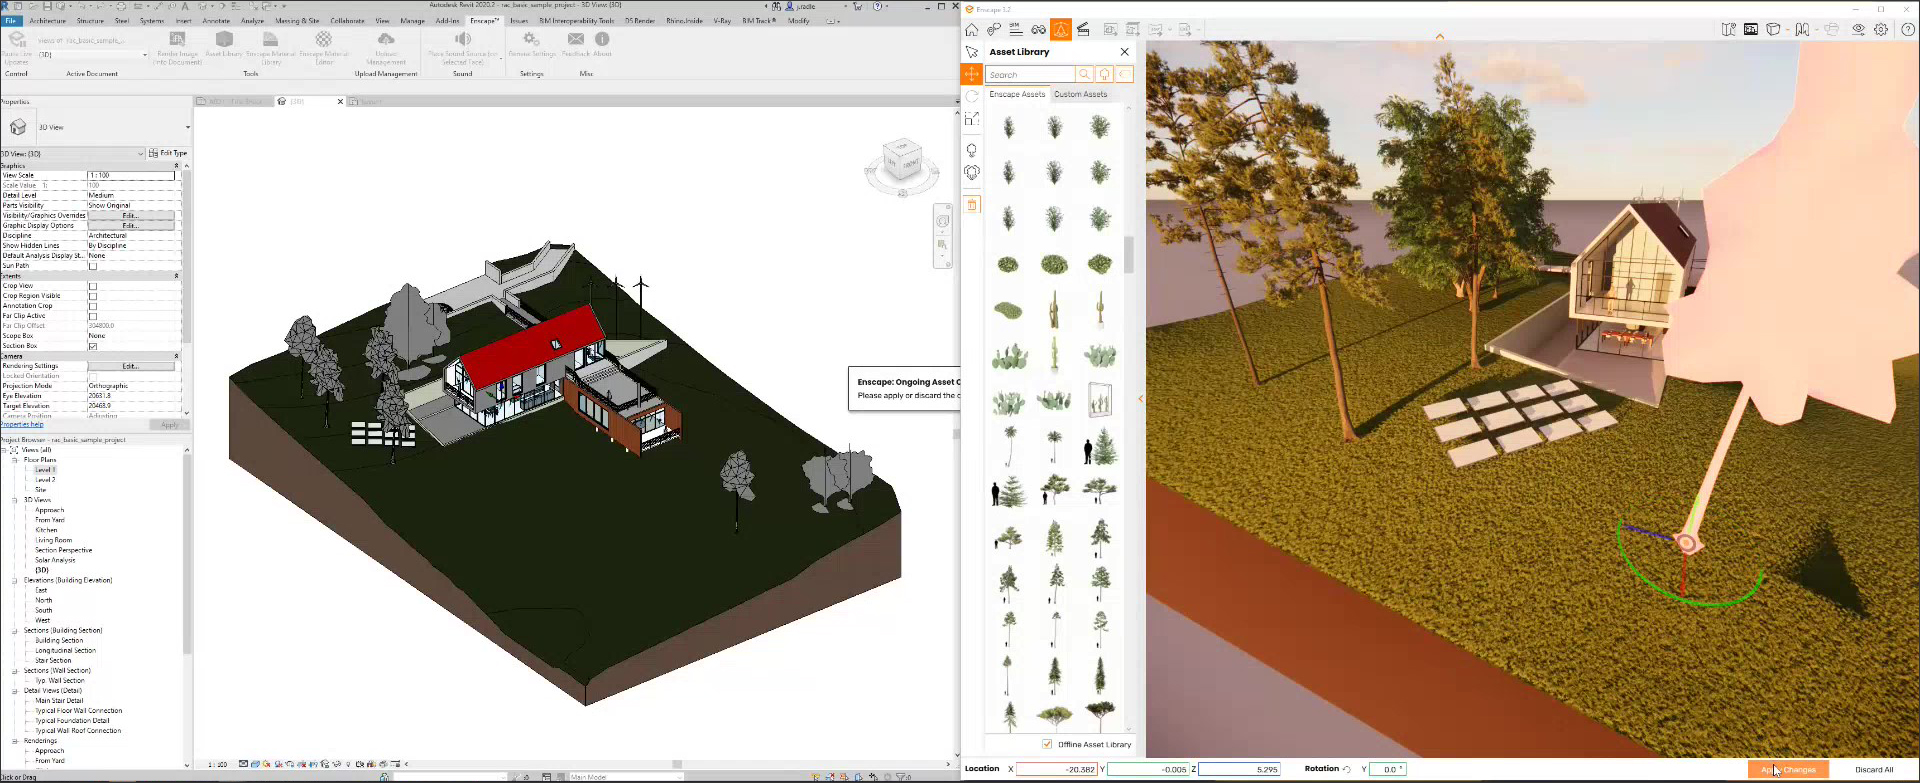
An enhancement in 3.2 version of the application, which has just been released, allows assets such as trees, furniture, people, vehicles, etc., to be placed directly in Enscape as well as moved, deleted, rotated, etc., as shown in Figure 15. An accompanying "Apply Changes" button has been provided which can be used to push these changes back to the model.
In addition to showing a “live” rendered view of the model during design, Enscape can also export final renderings with the technical specs set as required in the Output tab of the Visual Settings dialog, as shown in Figure 16. Multiple views can be rendered in batches

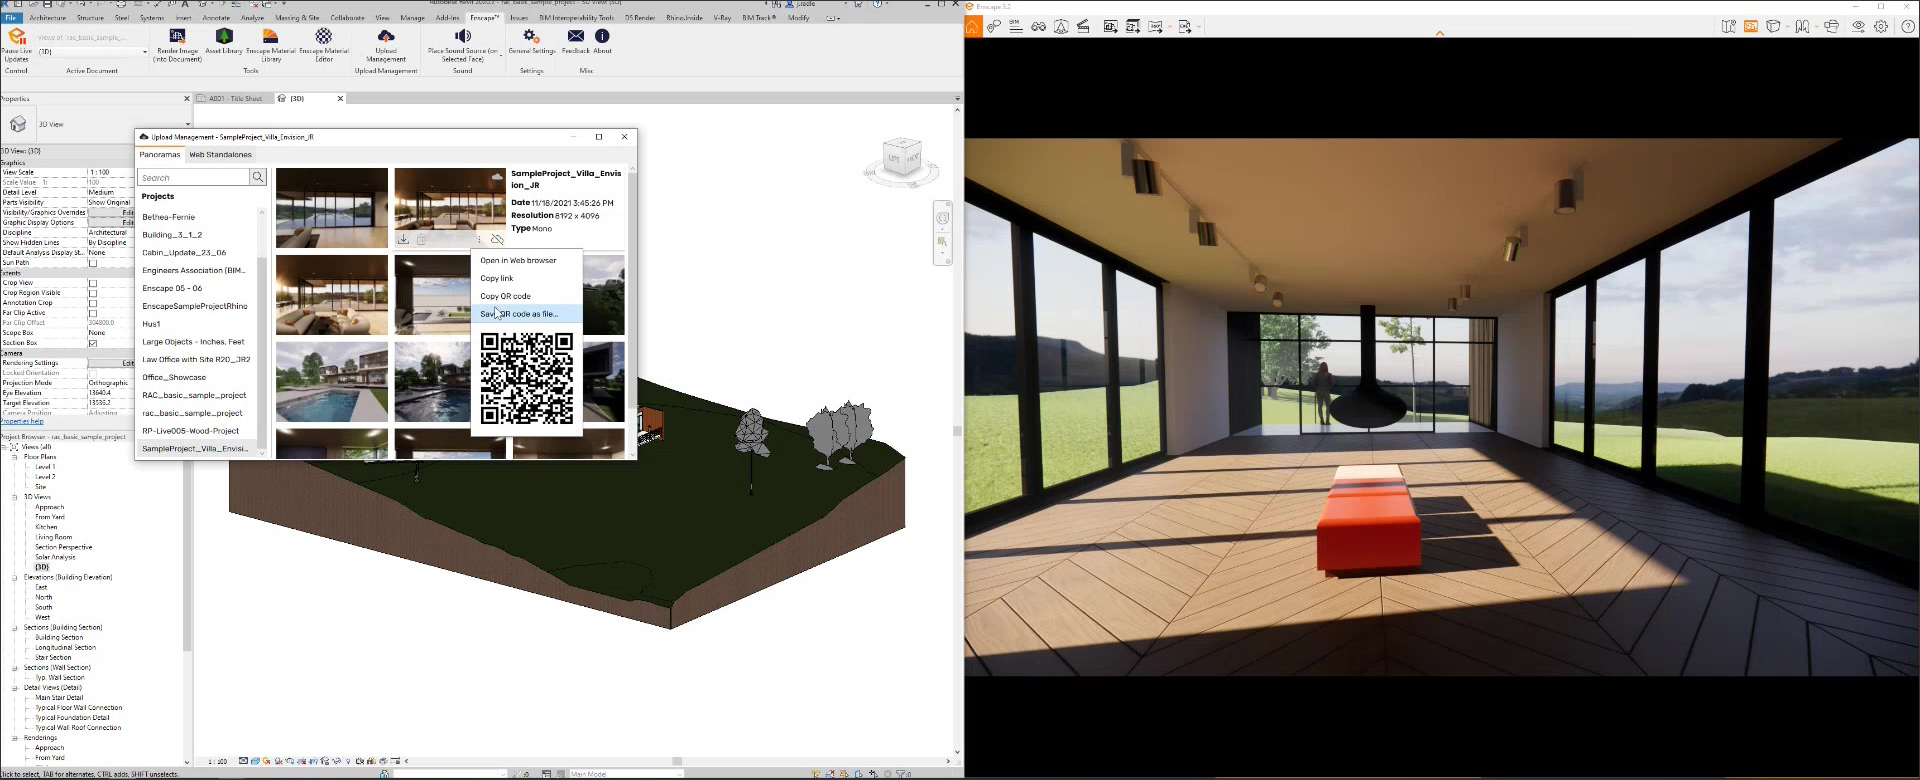
In addition to rendering scenes as shown in Figure 16, Enscape can also create panoramic views that allows clients to explore a 360°view of a space on their mobile devices. As shown in Figure 17, once the view has been created, a QR code for it can be generated, which can be shared by posting it on a website or on social media. These QR codes can also be placed on drawings. Clients can then simply scan the QR code to see the panoramic view associated with it, allowing them to explore the panorama and get a much better understanding of a space than a static view. There is also the option to generate a web link, which can be emailed to a client to experience the panorama in a browser if they are not able to use their phones.
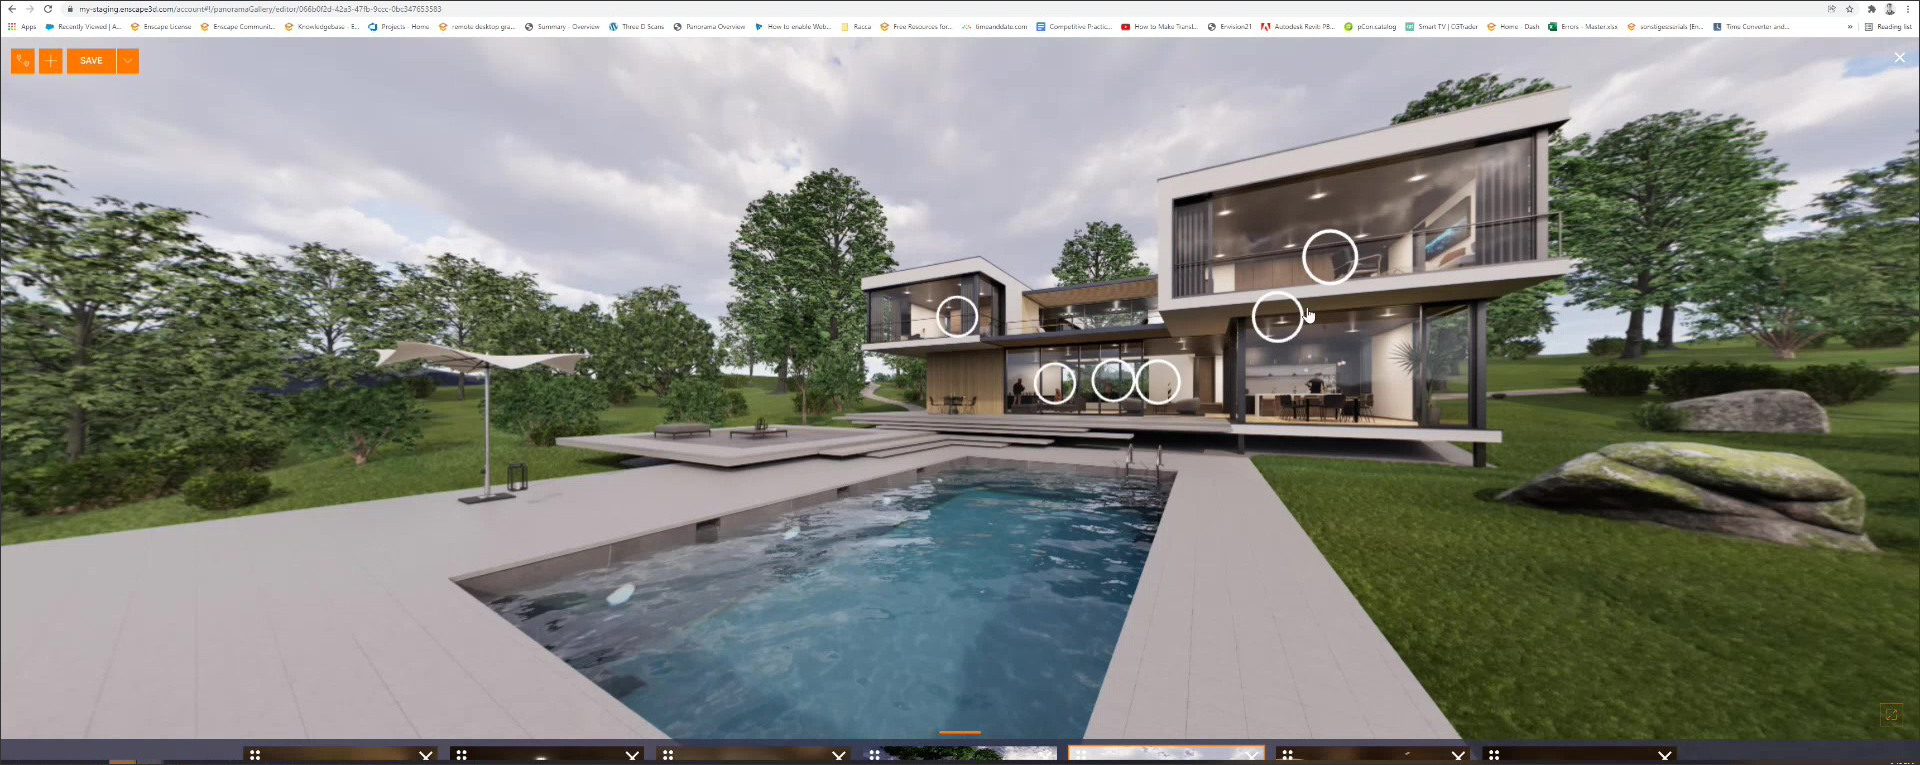
In addition to a single panoramic view, Enscape includes the ability to create a gallery of panoramic views. There is also a Tour Mode that can be activated to show areas in a view that can be clicked on to go to the next panorama, as shown in Figure 18. It's like giving a guided tour of the design. The entire gallery is also accessible via a link that can be sent by email or posted online.
A recent enhancement in Enscape allows the model to be changed, along with its associated Enscape panoramic views, without requiring the QR code to be regenerated. Thus, clients can always see the latest version of the design using the QR code or web link they were first sent, without the need to keep sending new codes every time the design is changed.
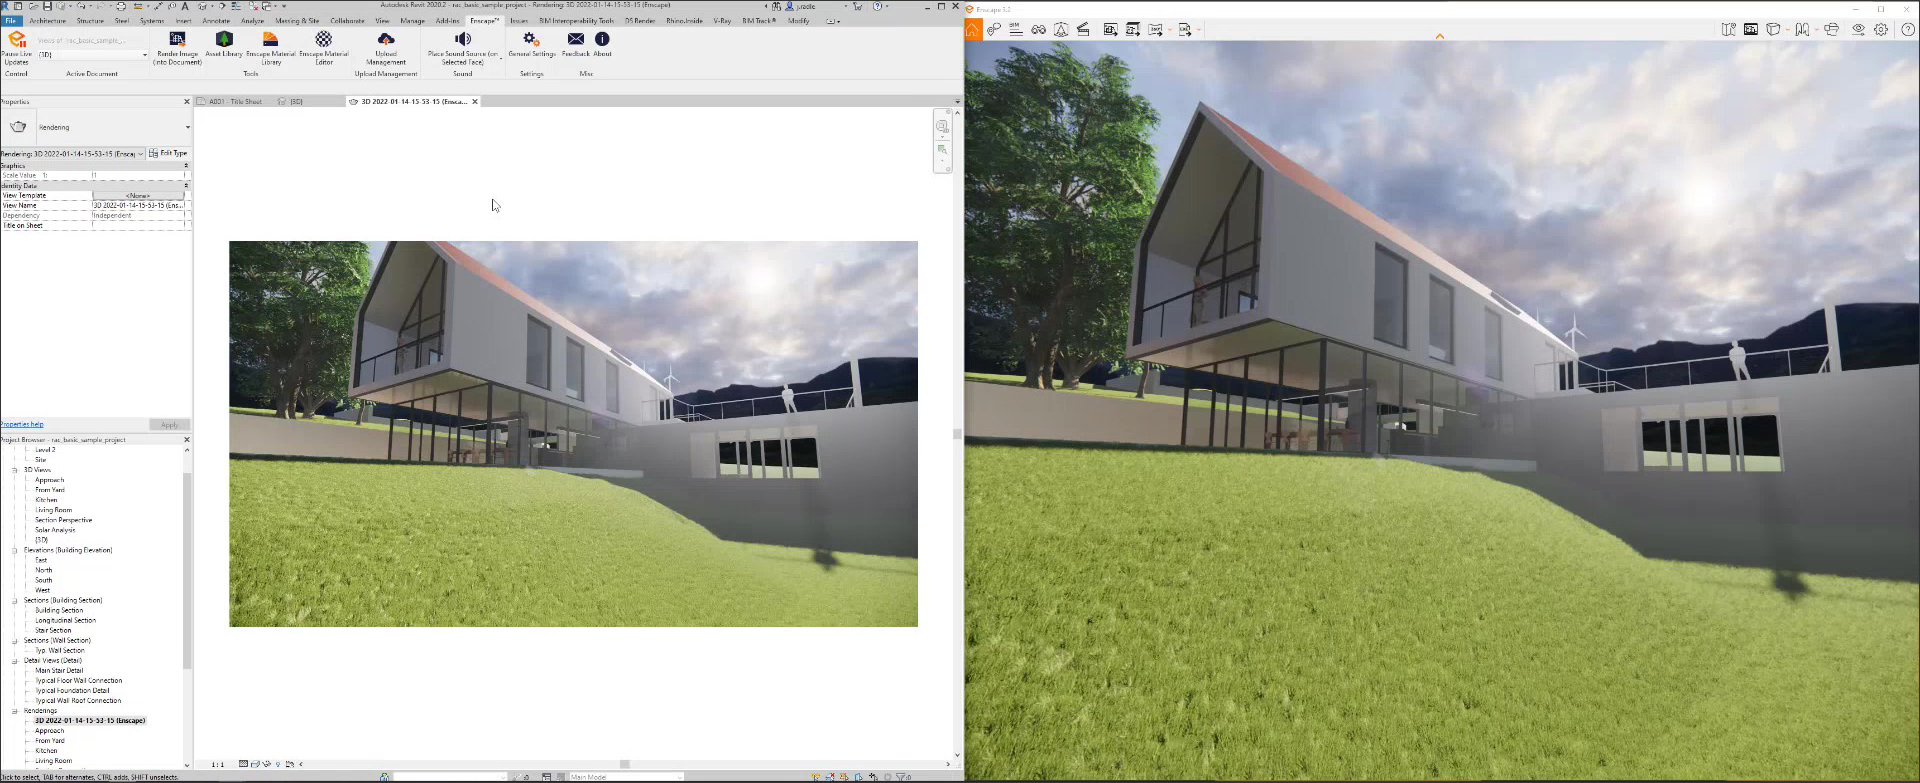
Additional features of the application include the ability to create an animation by specifying the key frames in a Video Editor; the ability to create an executable file that can be sent to a client to allow them to explore the model like a playable video game without requiring them to have the modeling application or Enscape on their computer; and the ability to create an Enscape rendering and add it to the list of rendered images in the modeling application so that it becomes a part of the project (Figure 19) and can, for example, be placed on a sheet.
It is also possible to synchronize views between the modeling application and Enscape, so that when you navigate through the model, you are also following the same path in Enscape. This feature is currently available in SketchUp (Figure 20), Rhino, Archicad, and Vectorworks, and will be available in Revit in the next release of Enscape.
What I most appreciated about Enscape is the simplicity and clarity of the concept — it is a real-time window into the model, so it reflects exactly, and only, what is in the model at any time. You cannot just “beautify” a design in Enscape and seduce clients with “pretty pictures” — what you see is what you get. I hope that the application continues to stay true to this fundamental premise as it develops further.
Which unfortunately, it is obligated to do, even though I thought it was perfect and should just be frozen in time!
Lachmi Khemlani is founder and editor of AECbytes. She has a Ph.D. in Architecture from UC Berkeley, specializing in intelligent building modeling, and consults and writes on AEC technology.
Have comments or feedback on this article? Visit its AECbytes blog posting to share them with other readers or see what others have to say.
AECbytes content should not be reproduced on any other website, blog, print publication, or newsletter without permission.
William Duff Architects, an architectural firm based in San Franciso whose projects include retail stores, single- and multifamily homes, restaurants, office spaces, cafés, wineries, art galleries, and full building renovations, shares its perspective on AEC technology in this Firm Profile.

Autodesk has just released the 2022 version of Revit, and Revit expert Dan Stine returns to tell us about tapered walls, PDF export, IFC4 support, 3D grids, new model categories, improved people flow, rebar enhancements, API improvements, and many more features in this release.
In this article, Erik Hultgren of Tech Soft 3D, discusses the advances made in visualization within the AEC space that keep making it taking quantum leaps forward, unlocking exciting new use cases and capabilities.
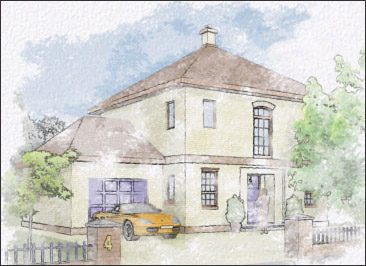
This review provides a comprehensive overview of the Piranesi, a unique application specifically designed for architectural sketch rendering that understands depth and perspective.