


With the launch of Vectorworks 2016 software in September 2015, Vectorworks provided an amazing tool, Marionette, allowing us to automate and speed up many of the tasks we currently do within the framework of Vectorworks. As previously cited in AECbytes Newsletter #75 published in May 2015, AECbytes editor, Lachmi Khemlani, Ph.D., commented: “From what I saw, Marionette seemed fascinating, and I would have to rate it as the ‘coolest’ feature I saw at this year’s AIA.”
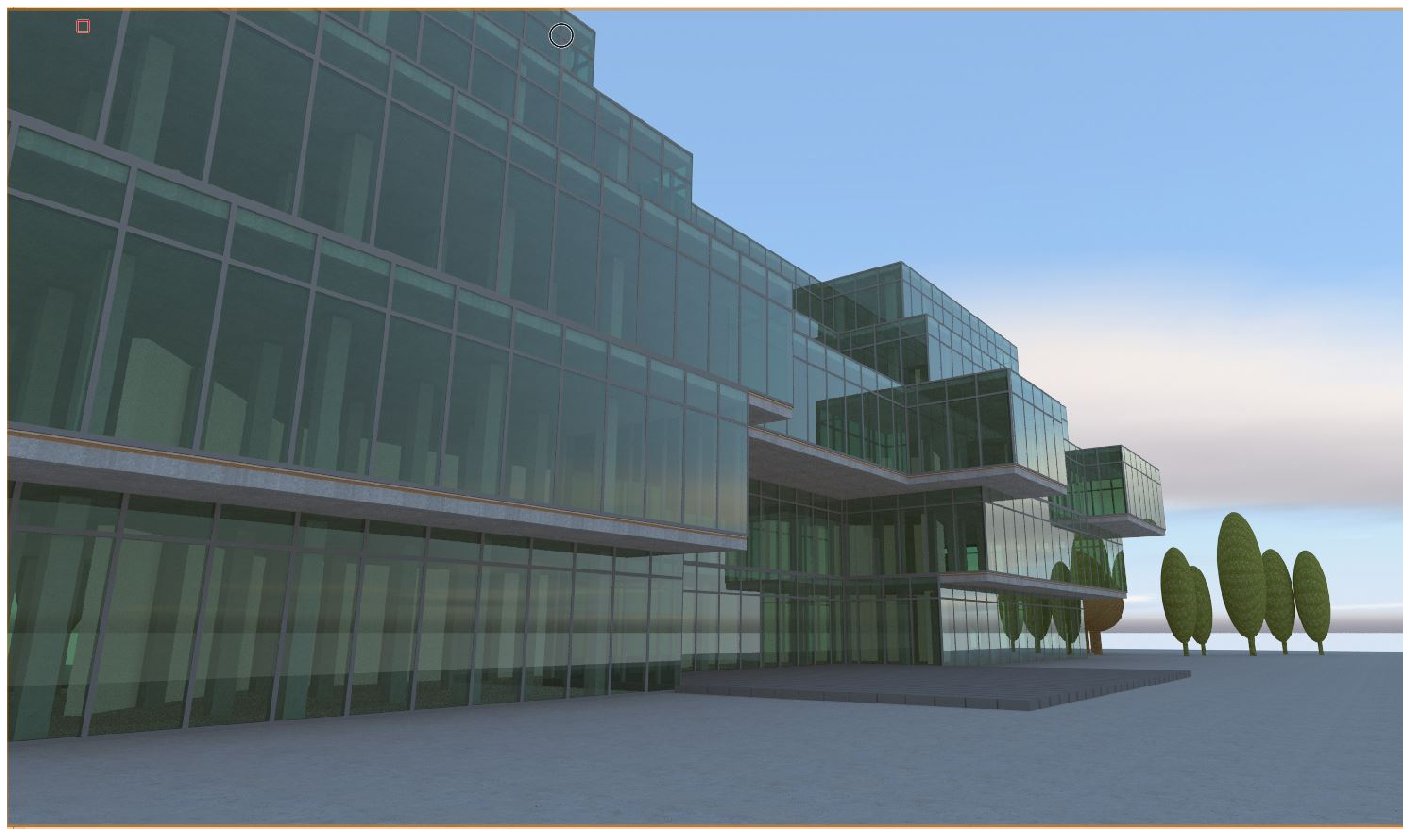
A graphical scripting tool like Marionette is, at its core, actually a visual scripting process that is only limited by our imagination. You need a repetitive task done? Marionette is for you. (See Figure 1.)

Before we delve into our first example, there are a few Marionette schematics to understand. A "script" in Marionette is called a "network" and resembles a flowchart. A network is a collection of "nodes," each of which represents a function or mapping from inputs to oututs. Data travels from left to right in wires between nodes, possibly generating Vectorworks drawings or BIM objects in the process (Figure 2).
Now that you’re almost a Marionette expert, on to the example. While the process of creating an object using Marionette may be different than other object creation tools in Vectorworks, the resulting geometry is the same. Let's say you have a 3D kitchen presentation you need to do quickly, and you have recessed pulls on each of the drawers and doors. Manually, it’s an easy process to extrude a rectangle, use the Extrude Along Path command (EAP) for your pulls, and then position them together in your model. You think you are free of the task until the interior designer suggests another drawer pull of a different size, and then asks, "Can we have narrower doors?" Well, we all know the usual process from here on. However, it doesn’t have to be so time consuming. By embracing the Marionette process and using nodes in this case to produce the same objects, you can use rectangular nodes for the doors, extrude nodes for thickness of doors, and EAP nodes for the handles. Same result, but you have more influence over unexpected adjustments (Figure 3).
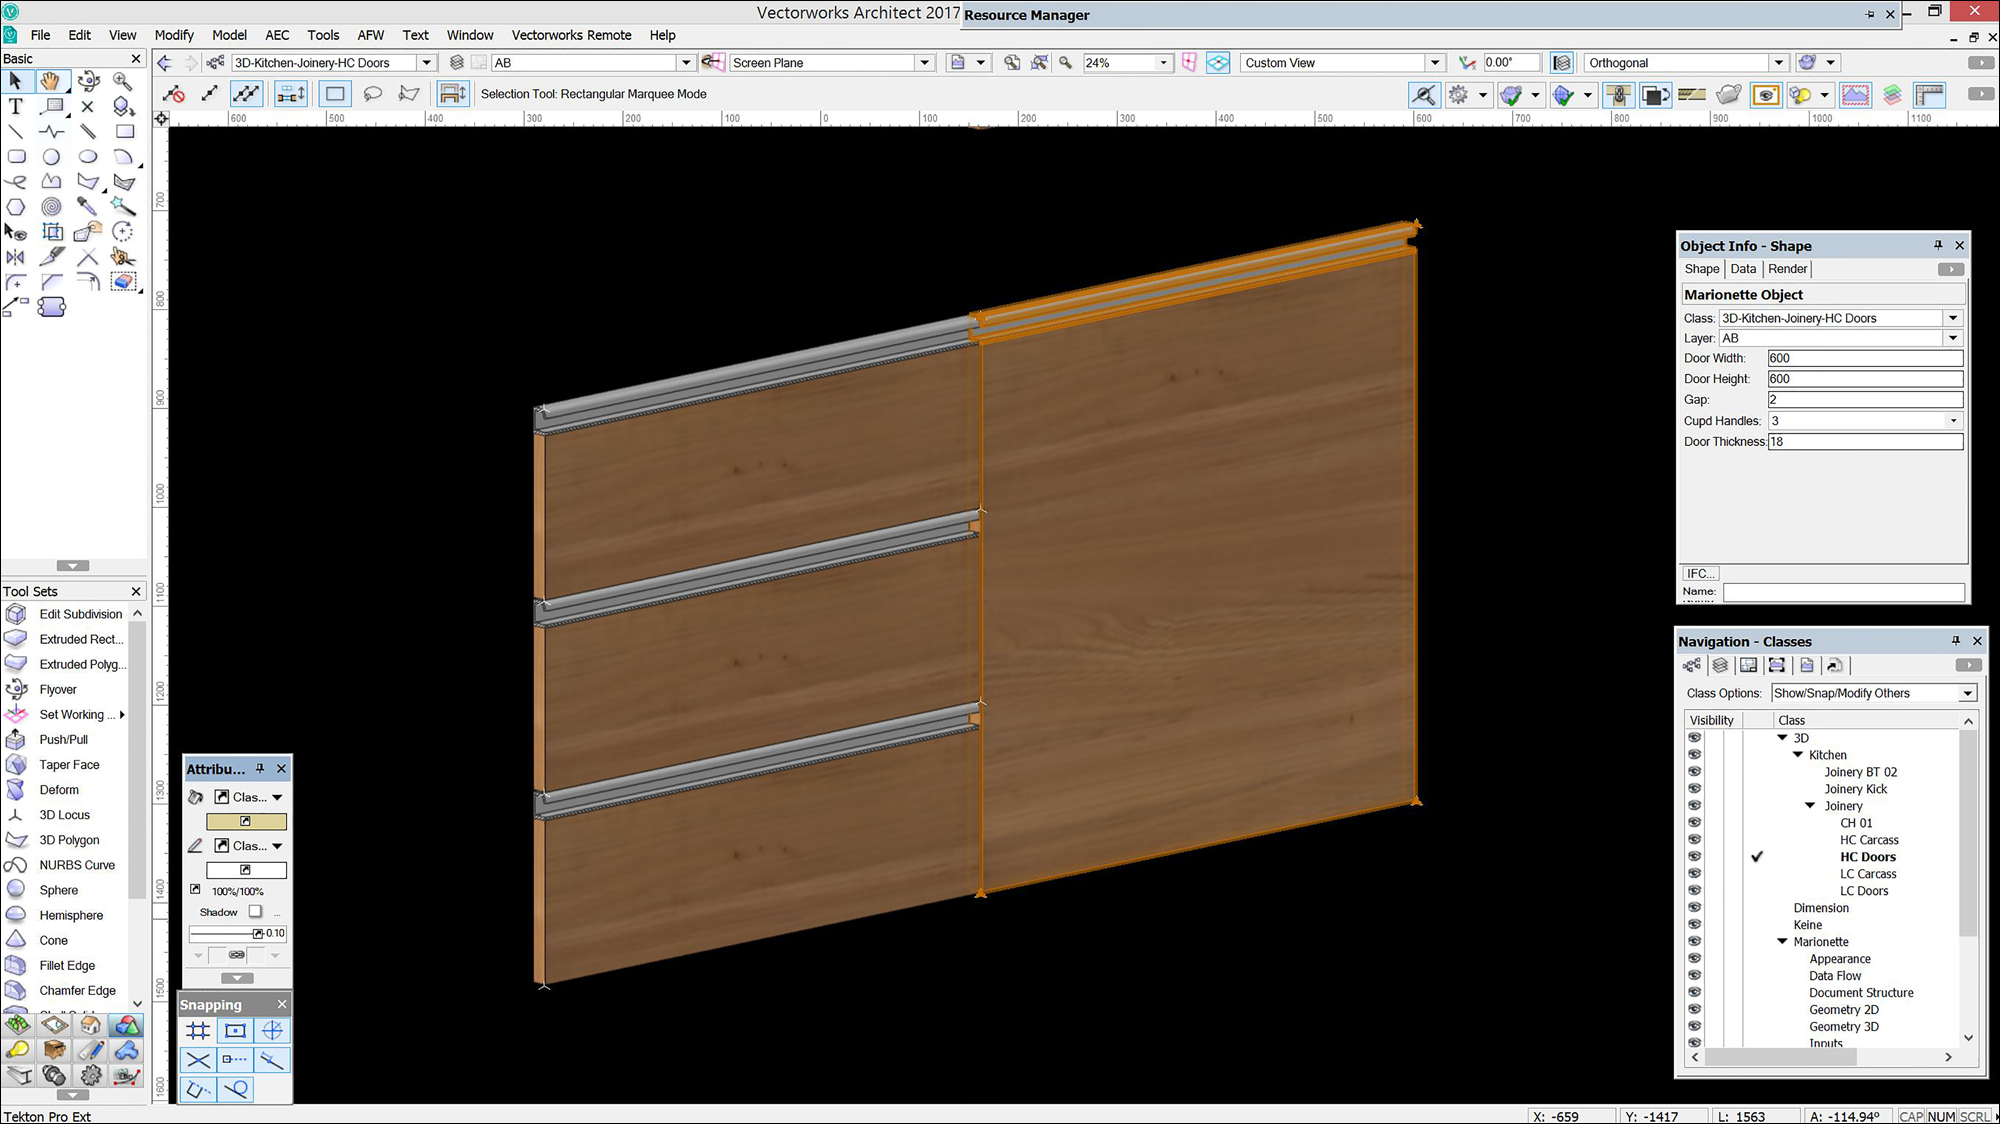
By converting the Marionette network to a Marionette object, the parameters of the script become more accessible. You can change the size of your rails, stiles, and doors, as well as the type of pull, while maintaining the overall size of your cabinet front as required, all from the Object Info palette (OIP).
So, when you are asked to change the drawer and door pulls, it’s not a problem as there’s no rebuilding of your model—all that needs to be adjusted are the parameters of the Marionette object. This Marionette object can be saved as a resource so that it can be reused repeatedly in other files, retaining the ability to change each object’s variables from the OIP without having to redraw everything. While this was a simple object, imagine a more complex object or task you always do. Marionette can automate the process for you, sort of like recording the steps you take when creating something, allowing you to play it back over and over again, each time changing variables that you preset.
Therein lies the beauty of Marionette.
So, you first have an idea of something you want to create. Take paper and sketch out your desired result. List what you want to alter in the final object: size, number of drawers, color, etc. These items will be your variables when the Marionette object is created. Sketch out the steps, and what you want to alter along the way.
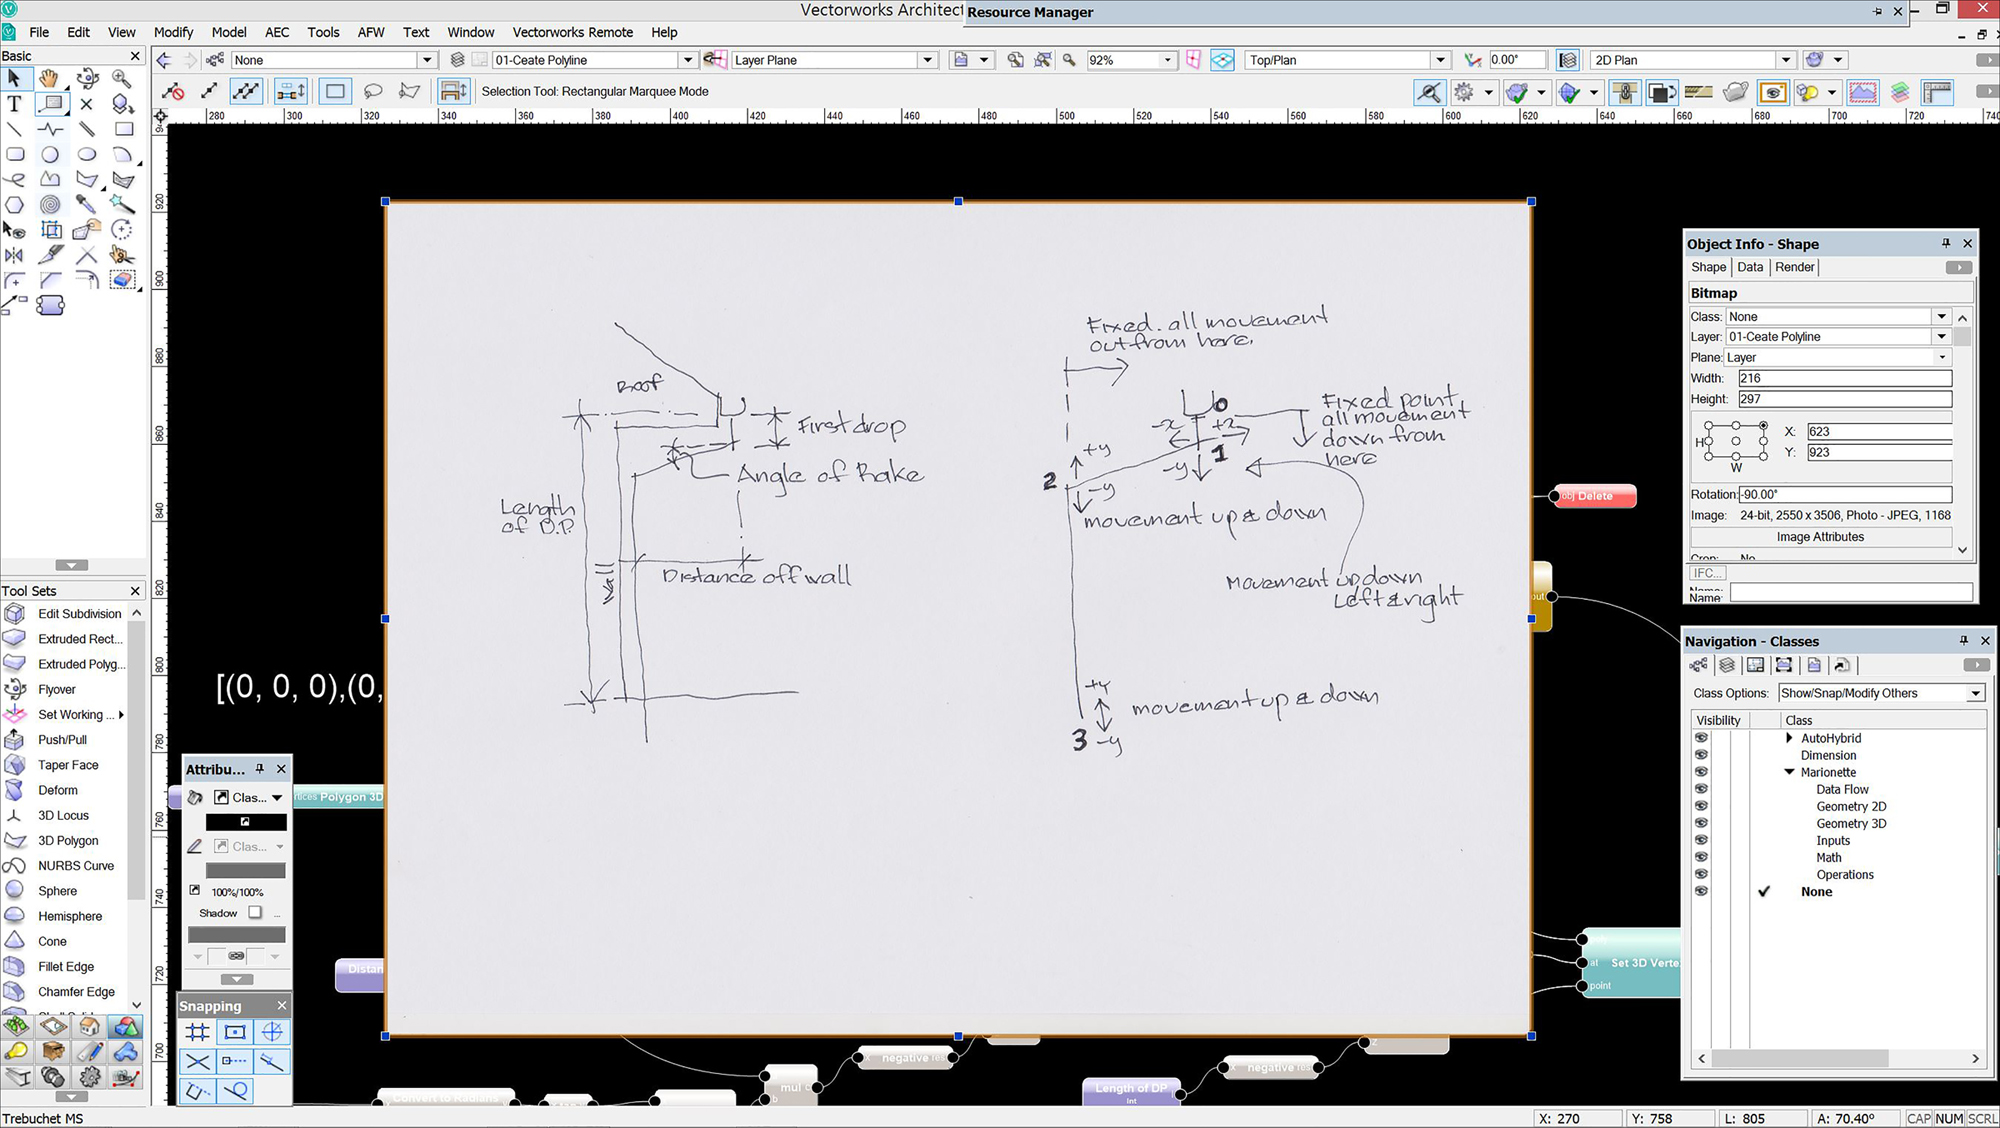
Let’s say you’re planning to create a 3D adjustable down pipe. To do so, sketch the basic polyline shape, then list the aspects of the object and building conditions that would affect its shape, such as the nodes or bends needed to change the length, the overhang of the roof, the drop from gutter to the underside of fascia, etc (Figure 4). Which values are adjustable and which are fixed? Do you want to be able to change the profile from circular to rectangular? Write it all down, as this gives you a clear direction and helps avoid getting lost in the process.
To fully utilize Marionette, you need to have a comprehensive understanding and knowledge of Vectorworks commands/tools and their outcomes—what works with them and what doesn't. Some commands work with polygons, some with NURBS.
Take the Sweep command for instance. To vary the center of the sweep, you add an object to sweep around. To loft, you need NURBS. If you don't get this right, you will get frustrated and probably blame the program. I've heard this so often: “The program must have a bug,” or, “It doesn't work.” I usually find that it’s a user problem. Simply put, the problem usually lies between the screen and the seat. Learn and understand each command and tool to get the most out of Vectorworks software and Marionette.
To be effective with Marionette, it’s helpful to have a basic understanding of Python. Why, you ask? Sure, you’re not a programmer and may simply want to draw or design – not learn programming. While most of the nodes in Marionette are equivalent to tools in Vectorworks, there are nodes that allow you to repeat a process, move bits of data around, and create lists. These capabilities speed up the process, creating a powerful tool of boundless potential that is only limited by your power of thought and patience. Simple nodes like “Repeat,” “Range,” and so forth provide that extension, enabling you to take your network to the next level. These types of nodes are derived from standard Python processes.
Take the house network shown by the images below. This entire house with slab, walls, roof, and gutter was created from a single polyline—using Marionette (Figures 5 and 6).

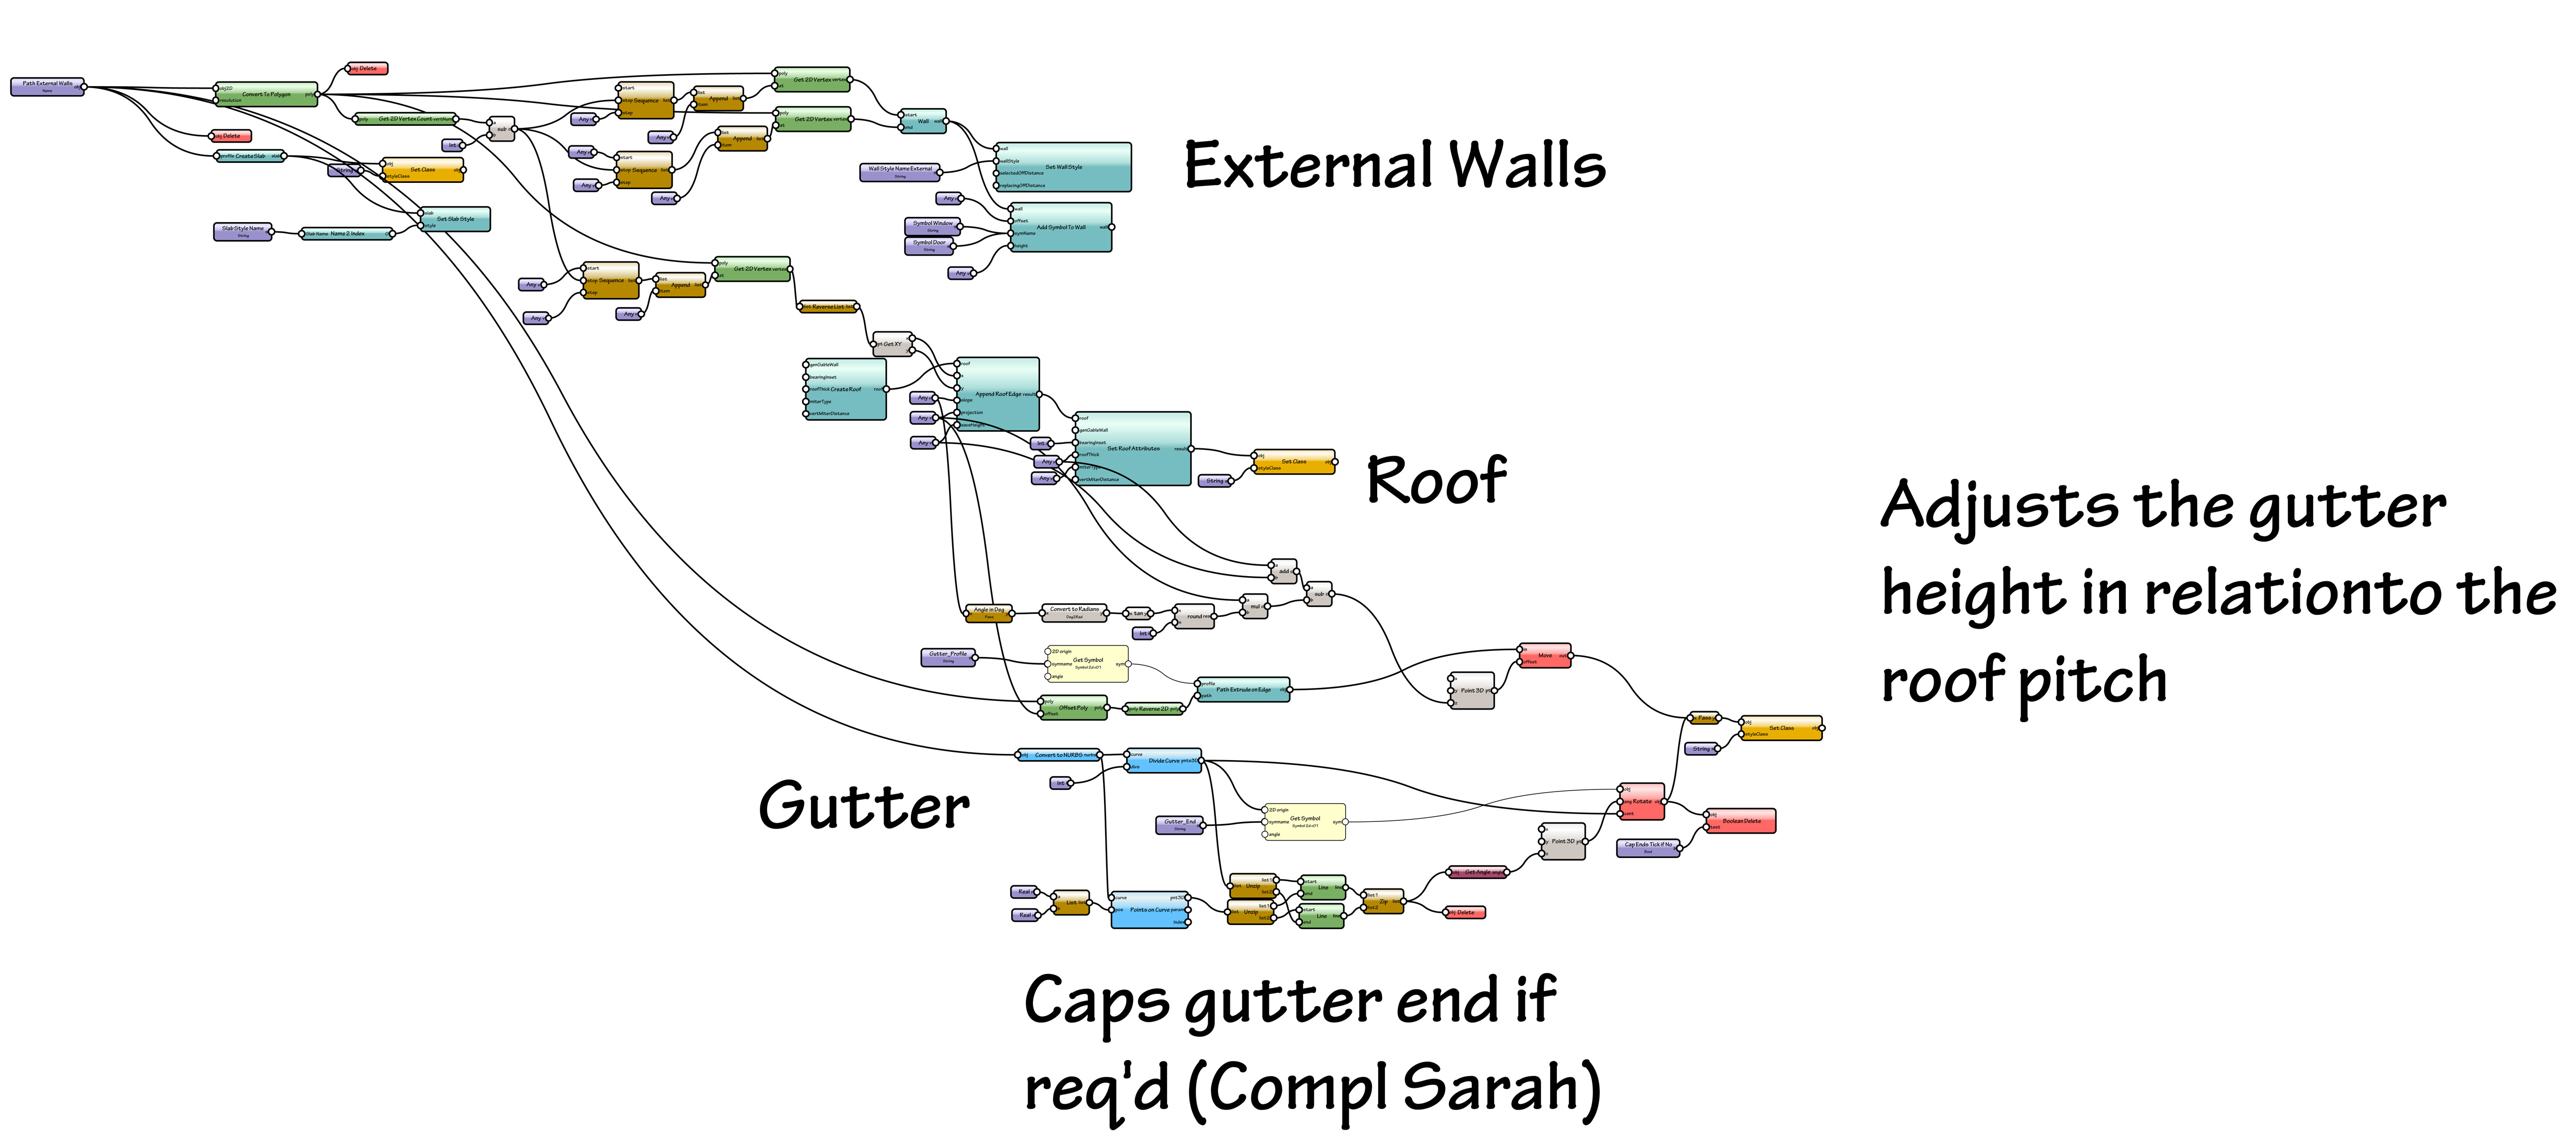
The secret to this network is the ability of Marionette to count the number of vertices (changes of direction) of the polyline. The nodes that are used to count, parse, and organize data are the same commands used in Python. So, a simple understanding of Python is essential for you to take Marionette to a higher level and provide you with endless possibilities.
You need to understand each node—its wants and needs, and what it does. A superficial read of a locus node, a node in the Vectorworks library, will lead you to think it's only going to produce a 2D locus. Don't look for a 3D locus node, you won't find one. Select the node and click the Edit button in the OIP, and the Python script is revealed. If you read this code, you can get a better understanding of what the node needs. For instance, ask yourself if the node is looking for (x, y) or (x, y, z) coordinates; does it require a float or integer, Boolean or string. In the case of the locus node, you will see an “if statement” in the code. If the number of values in the coordinate is two, it’s 2D. If the number of values is three, it’s a 3D locus. Read the node to understand what is required as input, and what it produces as output.
Once you are clear on what you are going to produce, start by dragging the appropriate nodes to a new file by working from left to right and connecting the nodes in sequence of operation. Think of the process you would use when creating the same object in Vectorworks and use the same sequence as a rule. Run your network to test it as you progress to ensure that it's working according to your needs.
If at any point, you receive an error message, it will likely give you an idea as to the problem. Undo your last node and recheck to see if you still receive the same message. You may be adding an integer when a float is required, a division by zero may be the issue.
You can use Marionette’s Debug mode to click on a wire to see what’s running through it, and this will help you to understand what's flowing through the network.
As your network grows, you may find that you can group sections of the network, so it doesn't become a maze of wires and nodes. A wrapper is what packages your network of nodes. When you wrap a network, you might need input nodes in and out of the wrappers. Add a pass node for all inputs and outputs that you need. Name them to suit, click on any node and right-click and wrap the network (Figure 7). At this point, you can move your network around. You will also be left with one node with input and output connections. The wrapper has all the values, and you can easily change the values in the OIP.

Finally, when all is working, you can right-click on your network to wrap it and then right-click on the wrapped network to select Convert to Object Node. There are two types of Marionette objects: one that only creates new geometry, and one that is based on “control geometry.” Control geometry is a shape or polyline that is wrapped up with the network and acts as the base or path of the network. A Marionette object with control geometry can be edited with the Reshape tool just like any other Vectorworks object, making for a flexible outcome (Figure 8).

The opportunities that Marionette presents to you are only limited by your imagination. See the problem, search for the solution, and reap the rewards. If you say it can't be done, you’re not thinking hard enough.
If you feel stuck at any time, visit the Vectorworks Community Board to ask questions, and you’ll hear back from me or other Vectorworks folks. You can also visit the Marionette Gallery section on Vectorworks’ Community Board to easily download and share inspiring algorithmic designs (Figure 9).

 Alan Woodwell’s 45-year career in the architectural profession has encompassed a wide range of projects from small domestic developments to a 12,000-seat indoor arena. He now enjoys working with a small practice that specializes in high-end residential, Playoust Churcher Architects. When the long-time Vectorworks user isn’t toying with Marionette, he's learning something new, or planning his next European holiday with his wife, Leonie.
AECbytes content should not be reproduced on any other website, blog, print publication, or newsletter without permission.